WilTec 300lb 135kg Hydraulic Motorcycle Workbench Lift Bike ATV Stand Jack Table Bench
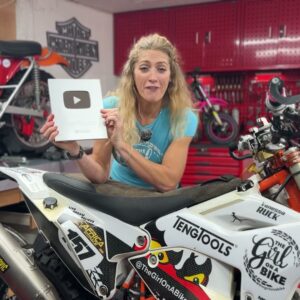
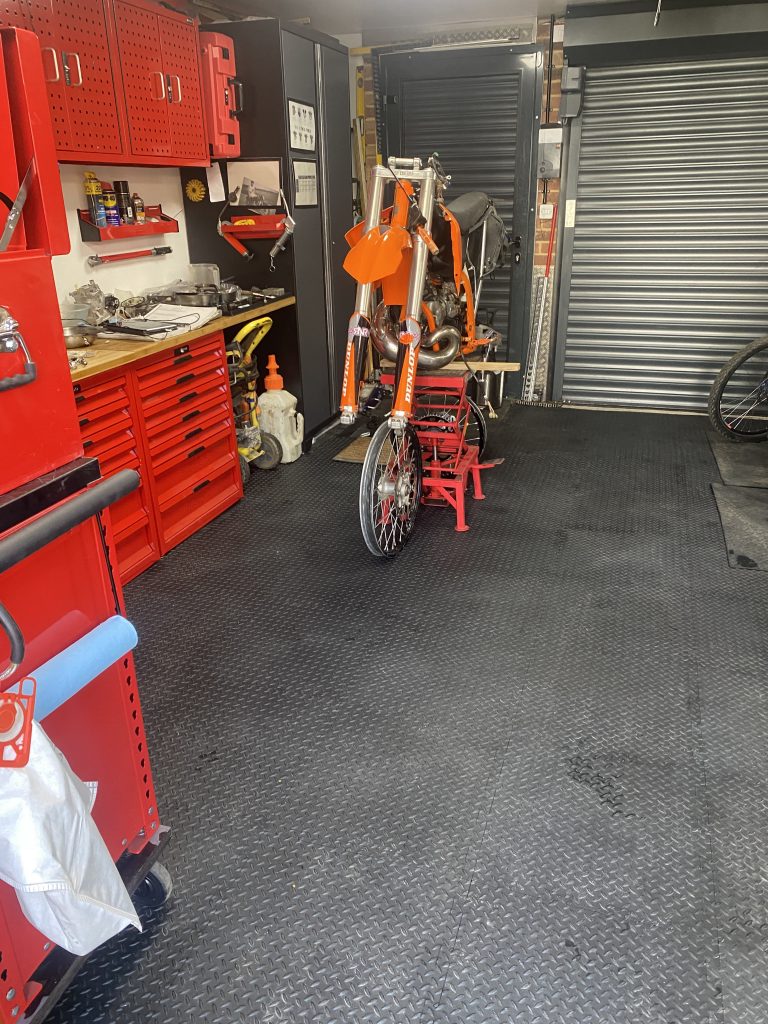
This is an absolutely fantastic bike lift. It’s small and compact yet highly capable. Being able to jack the motorcycle so high enables effortless spannering with easily hydraulic adjustments. The motorcycle bike lift is rather heavy making it very stable and has clips to hook onto the footpegs for added security. You can see a full tour of our garage here.
Hydraulic Motorcycle bike lift in action
WilTech lift
More details about the WilTec 300lb 135kg Hydraulic Motorcycle Workbench:
This practical Hydraulic motorcycle lift should not be missing in any workshop.
The Hydraulic Motorcycle Workbench Lift table with non-slip hard gum plate and the strong locking springs guarantee a safe stand for repairing or maintenance of motorcycles, roller or mopeds.
The Hydraulic Motorcycle Workbench Lift is carried out by means of a practical foot pump (foot pedal). The lift table can be lowered by using a screw. To avoid an uncontrolled lowering of the lift stand a three-stage safety can be installed.
The generously designed inspection chamber allows also by jacked up vehicles an easy access for changing oil.
The hydraulic motorcycle jack it is perfectly suitable for winter time due to the hydraulic load relieving.e-forme n’est pas possible grâce au guide fileté.
lifting height 35 – 90 cm lifting table 35 x 41 x 5 cm piston diameter Ø 24 mm inspection shaft 7.5 x 18 cm
Having used this for a few years in our garage I really highly rate it. It’s compact to store but hefty enough to get the job done on a decent size bike.
Having recently levelled up my riding from the 2020 Husqvarna
150i to the 250i
I was ready to tackle Cown…or at least that’s what I hoped.
BEEC Cown Leisure
The BEEC, a five-round championship, is designed to push
both riders and their bikes to the limits. After a very slippery round 1 at
Tong, Cowm Leisure hosted round two offering
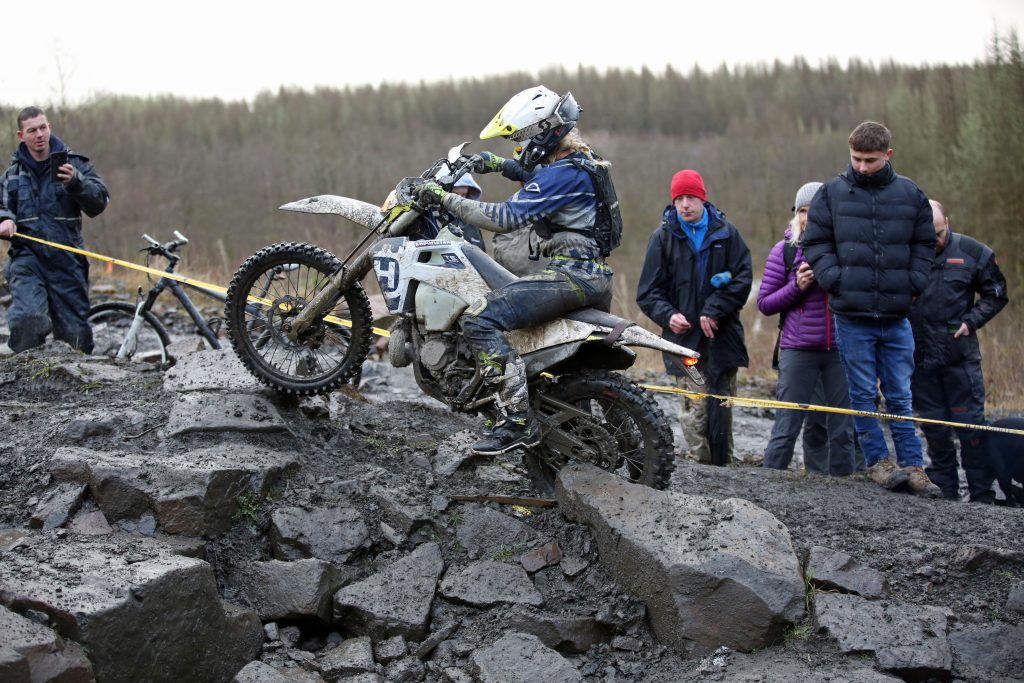
a multi-terrain mega circuit of an old quarry. The quarry provided growling
hill climbs, huge rocky technical sections, bogs and some downhills to make
even the bravest stomachs go wobbly. It’s a favourite with many different
riders from the top extreme riders in the world down to the everyday rider wanting
to show their abilities in the tough conditions.
Here’s a track walk of Cowm to see what the riders were up against:
The event hosts a two-hour morning race for Sportsman,
Sportsman Vets and Youth and a two-and-a-half-hour afternoon race for Clubman,
Elite Vets, Experts and Championship. This year saw the two big guns of British
Extreme Enduro, Billy Bolt and Jonny Walker go head to head in an epic battle
of supremacy with Storm Dennis showing his hand too and making a full-on test
of stamina and nerve.
It was fantastic to see multiple women out there riding.
Including Chloe Richardson riding
the PM race and finishing a very respectable 42nd! Other females in
the AM race included Rose
Roswett, Brook Johnson and me, Vanessa Ruck. It felt
amazing to be riding among other ladies, however, the female portion still look
up a tiny percentage of the total riders.
Wet and windy, steep and aggressive, and definitely a crowd
pleaser with many sections giving a serious displace of bike acrobatics…including
full back flips, loop outs and completely bogged down mud roosting.
Did I finish?
Hell yeah I finished! Marshals and spectators a like
reported hearing my little whoops of delight after surviving tricky sections
and by the end I was absolutely buzzing. I was exhausted and wet but the thrill
of making it and actually thoroughly enjoying it is like nothing else. Still new to hard enduro
finding my race pace is something I’m working on. I tackled Cowm gently, and as
a result managed to finish without burning out. However, I’ve still not found
my balance. A bit more aggression for round 3 will have a good few minutes off
my time.
Before the race I set my sights on two goals:
Making
a lap – which would involve successfully navigating every kill climb, rock and descent
to complete the course
Then,
if I managed a lap…I wanted to make 4 before the two hours was up.
I manged four laps placing me 37th in the AM sportsman
race.
One might naturally think that with each lap the riding
gets easier and easier, you’ve done it before, figured out the line and can
repeat…right? However, with a race in such gruelling conditions and a named
Storm Dennis throwing his weight in too, the track was changing dramatically
with every lap. Two particularly nasty downhills absolutely terrified me. Every
lap forcing me to kick myself to get down them. They were step, curved and had
huge rocks that lay there waiting to have you off. By lap four they were ever
trickier and no less horrific. In fact, one actually had a medic on permanent
station due to the falls. Thankfully I wasn’t one of its meals!
Finish line feeling
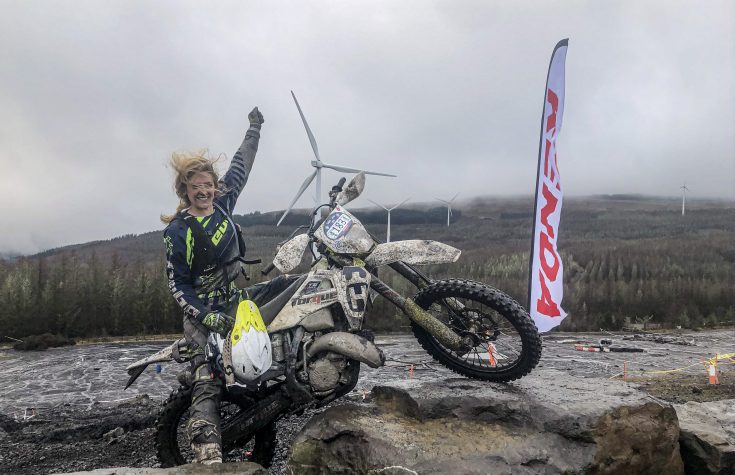
Crossing the line saw me covered in mud, my bike had half a clutch level, a wobbly rear brake pad and a broken spoke but my body was in one piece and my mind was on fire with adrenaline. The course definitely pushed us like you would expect with extreme enduro. I was satisfied and over the moon to have finished. And with March marking the 6 year anniversary to my life changing accident it was an incredible feeling standing there covered in mud and sweat knowing I’d made it. I’d finished a British Extreme Enduro Championship round.
But… as I stood there, I also knew I could do better!
Time to recover, refuel and crack on with training. It’s also time to get some
proper Acerbis protection on my poor
bike, which took a beating.
More than just dirt bike riding and racing, I’m on a mission to prove that nothing is impossible if you want it bad enough. See more about my story here plus read about my life changing accident, which started it all.
The Girl On A Bike’s motorcycle journey from hospital to hard enduro
My bike journey has developed through an incredibly journey over the last few years, starting in The Bahamas and now reaching hard enduro. Here’s the full story.
Don’t wait for life, ride to meet it!
I did not grow up with motorcycles, I wasn’t a small kid braaping around at an early age. I was into the world of four legged friends, obsessed with horses. This meant I was lucky enough to ride a family quad bike in my teens. But no motorbikes. However, the combination of this and my love for cars and adrenaline was enough to spark motorbike enthusiasm later in life.
How it started
As soon as I turned 17, I was off driving; passing my test just 16 days after my birthday and within the year I had my IAM Institute of Advanced Motorists qualification. In these early days, my world was all about cars. The Girl On A Bike was not even on the radar.
The Bahamas…
This all changed when I lived in the Bahamas in my early 20s for 1.5 years, here on a remote island transport was difficult. I couldn’t afford a car, so I bought a Chinese Lifan Enduro 250 motorbike and had it shipped in. There wasn’t a single other bike on the island and I’d never ridden a bike before, but that didn’t faze me. Others can ride bikes, how hard can it me?
I was however rather shocked when it arrived part assembled in a box! Yikes. Thankfully a trade for a bottle of rum saw a local bush mechanic put it together and I was on my way. I never remember ‘learning’ to ride. I just did it as it was the only way I could get around the island. I was very soon found exploring the remote island of Eleuthera, where I lived, with my spear and fins strapped to the side for spearfishing beach adventures.
So my first bike was quite an adventure, lots of sand and track riding. I then came back to England and realised that it was about time I actually got my full licence…I immediate passed my full access licence but years went by without having a bike. I guess early in my career and post-university I couldn’t see the financial commitment of a second vehicle as feasible when a car was vital.
My first bike, a Lifan Emduro 250 in The Bahamas
The Accident
I was living in the UK working 9 miles from home and so I commuted by bicycle. However, this all changed with my accident taking the my strong body away from me [read more here]. In the years post my accident I was unable to do my commute cycling and thus was driving in our 3.5 litre V6 Mercedes-Benz Viano….which drinks petrol back and forth to work. Once physically able I decided to get a bike, the Suzuki Bandit, to skip the traffic and save money…
I went for a little 600 Bandit as it was the ideal commuter. Light, reliable, low cost and pretty nice to look at.
My commute a Suzuki Bandit 600
As The Girl On A Bike I wouldn’t say I am a stereotypical biker chick, but I am definitely a biker chick
Then came the Harley-Davidson’s
The love for Harley-Davidson’s started on our honeymoon when we hired two bikes out in Texas and racked up 1,000 miles across 5 days exploring Mid-point café on Route 66, Cadillac Ranch, Amarillo, and the breathtaking scenery of the Palo Duro Canyon. It was an amazing adventure [read about it here]. Then on one of our wedding anniversaries, we hired two Harley-Davidson’s in England and that was it. Within a few weeks, we decided to buy two, and the Harley adventure began. :Looking back now it was one of the best decisions we made in my recovery. In the first three years, around my numerous surgeries, we managed 10,000 miles, countless weekend adventures, wild camped, explored 6 national parks in the UK, enjoyed sunrise rides over Tower Bridge in London and generally had a blast on two wheels.
The Harley facilitated a sense of freedom and adventure but required minimal physical capabilities for me. We could get out and have an ‘adventure’, yes nothing like our pre-accident adventures, but it was still an adventure. I remember the first weekend away. We rode about 6 miles to a campsite, we had a BBQ, bottle of bubbly and I was out of the house. It was so uplifting for my spirits among so much rehabilitation and pain.
Read more about my irreversible journey as The Girl On A Bike to becoming a Harley-Davidson rider here.
Transition to dirt bikes
I was off work post my first hip surgery, I was bedridden, but I woke up one day and turned to my husband “Please can I have a dirt bike?” To this day I’m not sure what sparked it by let’s just say he was more than thrilled by the idea. As soon as I was mobile enough, we started the hunt and found a Yamaha WRF250 4-stroke. From what we had read it was a great beginner’s bike, friendly and reliable. That is was!
It was 5 months until I could sit on it but I had it. It was sat there as a goal. Something to strive towards, help motivate me on those days where the pain just made me want to quit. Once I was able, always following medical recommendations, I was buzzing around on her, named Whizz. It was just gentle green lanes near home.
KTM EXC 200 2-stroke
KTM EXC 200 2-stroke
However, I soon realised my hip was not okay and more surgery was required. We also realised she was just too heavy for me at 125kg. A bit of research and introducing Smokey, a KTM 200 2-stroke at only 95kg. I’ve fallen in love with the fiery power and such ease of maintenance of a 2-stroke. Fast forward three years and I’ve managed about 5 months riding with 3 hip surgeries in between. The EXC was swapped for a newer model with the ‘hip saver’ button AKA electric start.
I’m now riding a Husqvarna 2-stroke and loving it. The improvement on the 2020 models is incredible.
The Girl On A Bike and Husqvarna 2020 TE 250i
Then came trials
Having had my forth hip surgery, a full reconstruction, I was on a the mend and desperate to get back riding. I was yearning for enduro but I couldn’t take the risk with my hip so decided to work on the foundations – trials. Picking up a Beta Evo 125, an ideal first trials bike, it all started in the garage.
Long before I could even think about riding it I was working on my balance. Much of my physio was core strength and stability so track standing was ideal. I would spend lots of time in the garage just balancing. Working towards taking my hands off the bars and eventually worked up to being able to hold a track stand for 15 minutes. Once able I then got outside and started low risk figures of 8 and slow maneuvers, before eventually ramping things up with a trip to Andorra.
The Girl On A Bike trials riding
And ADV
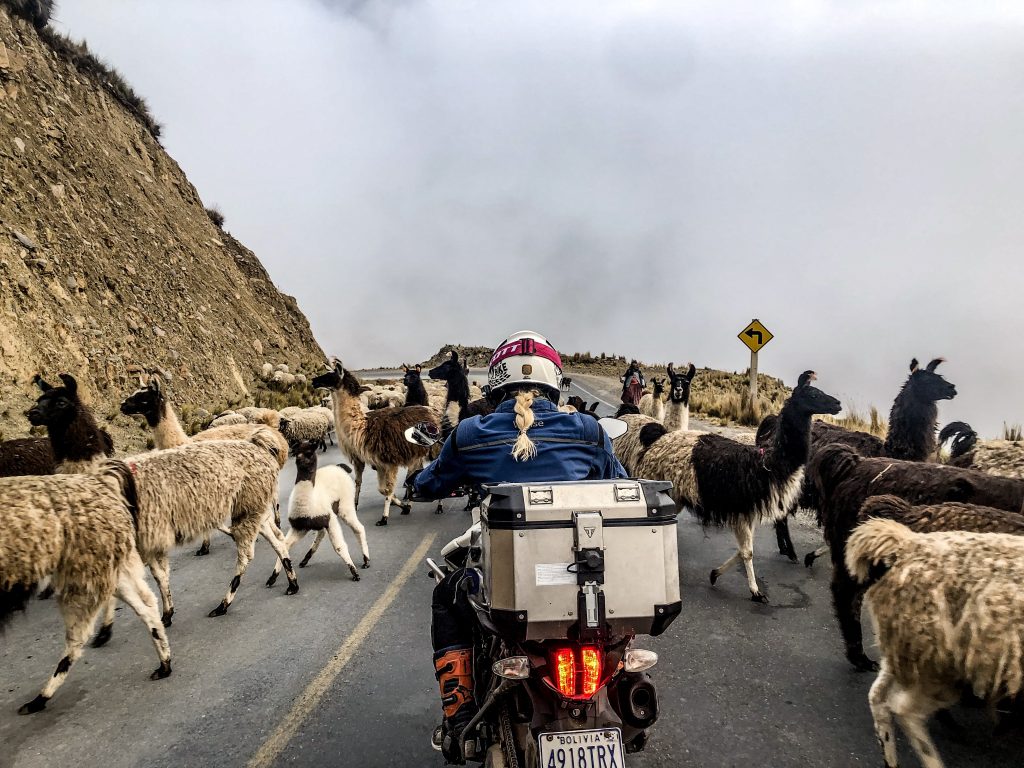
ADV started with a mega adventure with The Girl On A Bike going to Bolivia riding Triumph Tiger 800s with Novo Adventures. There theory here was big comfortable bikes, low risk for the hip given the sort of terrain we would hit. I quickly fell for ADV due to the incredible mileage you can cover, the capability of the bikes and the culture you can absorb. More on Bolivia here: Death Road, Salar de Uyuni and videos over on my YouTube.
The Girl On A Bike ADV riding in Bolivia
The magic mix
The combination of all these bike types gives so much freedom. On the Harley-Davidson, you have the open road, the distance and the ability to strap a bag on the back and disappear for the weekend. The adv adds some mud and serious distance. It’s all about the freedom and the adventure. However, it’s rather sedating, and with my inner thirst for adrenaline, it doesn’t fully satisfy me. This is where the dirt bikes come in! On the KTM you can travel across epic terrain and explore the countryside in a totally new way. It’s fast, technically demanding and physically exhausting, whether it’s green laning or entering enduro races.
But, all of these types of riding have one great thing in common, and that is the ability to travel. I’ve now ridden in Texas, UK, Wales, Scotland, Ukraine, Sardinia, Spain, Andorra, The Bahamas, Dominican Republic, Croatia, Italy, Germany, Switzerland…the list goes on. The scenery you can explore on two wheels is incredible. I’m looking forward to making many more adventures, most likely in countries I wouldn’t have landed in if it wasn’t for the bikes.
The adrenaline seeker was back
With my rehabilitation seeing my back to strength, still very much aware of my slightly reconstructed body, but able to push on, my inner thirst for adrenaline was screaming. I’ve always been use to putting myself outside my comfort zone with extreme sports such as snowboarding and kite surfing so now it was time to up my game. Introducing hard enduro. It started with small terrain, building the skills and now I’m riding the British Extreme Enduro Championship. I’m now riding a 2020 Husqvarna 250i and I’ve entered the RedBull Romaniacs in the IRideWess hard enduro series.
Check out how my first ever hard enduro event, Valley’s Xtreme, came about and how it went here.
The TE 150i is a pocket rocket not to be underestimated
Where the road ahead will take me is something I look forward to finding out!
I 100% put me being at Valley’s Xtreme on Mr Paul Bolton! I
was training with Paul at Toro Trail
in Spain and after two days riding he told me I should enter Valley’s Xtreme. My response was laughter
– “like I’d manage that”. But with persistent persuasions Paul had me sign up
for the practice day.
Valley’s Xtreme has a great set up where they open a
portion of the track up on the Saturday allowing riders to either ‘have a taste’
of the race or a practice pre-race. We had nothing to lose trying it, so my
husband and I rocked up with the goal of making just one lap. Valley’s, based
at Walters Arena in south Wales is known for it’s gnarly terrain and challenging
obstacles so a lap would be an achievement in our minds.
What we didn’t expect was to make three laps and finish
feeling absolutely buzzing… Let’s just say after a little chat with other
riders…we jumped in and signed up to the AM race the following day. Yikes, I
didn’t sleep too well thinking about the obstacles I’d be trying to navigate in
the morning.
What have I gotten myself into!
Valley’s Xtreme
This is a solo event to find the ‘King or Queen of the
Valleys’ in a gruelling battle around a ten mile track at Walters Areana. Riders
quality for their starting position in a 1-mile prologue on the Saturday
afternoon. This prologue is a series of man-made obstacles from huge metal
skips, large plastic waste pipes, boulder beds and tyre pits. This course then
becomes the start of the main race, forcing riders to tackle them all again. There
is an AM race followed by a PM race where the afternoon adds tougher sections
for the expert and pro riders. This year saw Paul Bolton taking home PM “King
of the Valley’s”
As my first hard enduro event I was expecting to be among a
small handful of women. However, to my surprise I was the only one. It saddened
me that more women were not out there enjoying it. The buzz from the crowed
when they see a blonde ponytail is mega. With the body weight and strength to
bike ratio hard enduro is certainly more of a challenge for a small lady than a
big guy but it’s still achievable. I also think the Husqvarna
TE 150i is such an ideal bike for us smaller riders that I hope more will
start to join in. [see my YouTube
review]
Valley’s Xtreme in a few words
Gnarly, wet, snotty and tough but in all the right ways. If
you’re looking for a challenge to push yourself to the next level…this is it! I
finished with such a high of satisfaction it was like I was on drugs. Happiness
drugs!
Did I finish?
My goal was to make Bronze [see below on how finishing
works]. I rode steady and within my capabilities, I didn’t race. Looking back,
I wish I had raced as I think I could have given a lot more, but in my first
ever hard enduro I did not want to burn out. I was chuffed to make 1.5 laps,
placing me into Silver. I’m blinking proud of myself completing silver and
taking on all the challenges. And I didn’t come last! A respectable 48th of 81.
Finish definitions: Bronze = 1 lap, Silver = 1.5 laps,
Gold = 2 laps. To put it in perspective, only 19 riders finished Gold in the AM
race.
Finish line feeling
I was like a bubble of ecstatic energy on the finish line! I could barely believe I made it around. I even described it as the best day of my life [bar our wedding of course…but I have to say that]. There is a level of satisfaction that extreme enduro gives like nothing else. It’s so physically and mentally demanding. You’re riding with 100% focus on such tough terrain. It’s like nothing I’ve done before. I was buzzing like a bee! I was also covered in sweat and mud, and massively graving a big burger from the burger van to refuel.
The TE 150i is a pocket rocket not to be underestimated
More than just dirt bike riding and racing, I’m on a mission to prove that nothing is impossible if you want it bad enough. See more about my story plus read about my life changing accident, which started it all.
Worlds Most Dangerous Road Riding adv motorcycles, Tiger 800s, with Novo Adventures
Satisfied and still alive! Welcome to the Death Road…
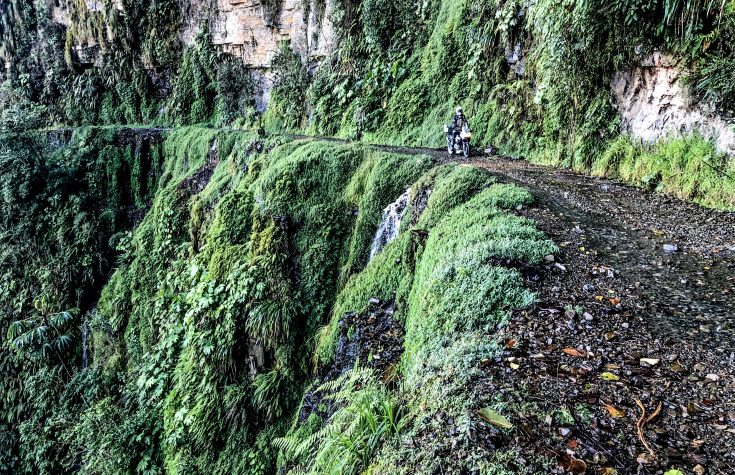
So… Do I think The Yungas is still worthy of the infamous ‘death road’ name? Well there are sheer drop offs, no railings, landslides and drops that will give butterflies to even the bravest of souls…but given traffic is now largely just tourism, with normal users rerouted to the new road, you’re more likely to meet a mountain biker than a bus on the hairpins. It’s certainly a buzz to get the adrenaline going and give you some epic views, but it’s no long a big killer.
I was lucky enough to I ride Death Road in Bolivia on Tiger Triumph 800s with Novo Adventures and I would say it’s one for the bucket list in SA.
Who fancies it?
And if you’re new to my YouTube please, please do hit subscribe, share, comment, like and all that lovely stuff. You guys rock!
More about the road and why you should ride it:
Yungas Road, grimly known as ‘Death Road’ due to its notoriously high death rate of 200-300 annually until the mid 90s, was cut into the side of the Cordillera Oriental Mountain in the 1930s by Paraguayan prisoners during the Chaco War. A combination of single track roads, 900m high cliffs, rainy weather, limited visibility, rockfalls, and lack of guardrails, has resulted in many motorists plummeting to their death.
Surrounded by mountainous terrain and terrifying precipices, the winding road stretches 69kms reaching 4,650 meters from La Paz to Coroico, connecting the Amazonian rain-forest to the capital city.
Death Road was the only link between La Paz and the Yungas region of Bolivia. It was thus not uncommon for crowded buses and trucks overloaded with people, wood and crops to overtake each other on the 3 meter hairpin turns, even at night. These perilous conditions meant many of the buses and trucks went down the side of the cliffs taking all passengers with them .
So why would we want to ride it on motorcycles? Is it still as dangerous?
In 2009, construction of an alternative road replacing the dangerous 64km stretch was completed with all traffic being diverted. Enabling motorists to travel from La Paz to Coroico without fearing the journey may be their last. But The Yungas remains open for those who dare.
Even with these improved traffic conditions, Yungas Road shows no mercy. Nowadays, the death toll is limited to local workers and daredevil tourists still using the infamous road. It is believed that more than 22 riders have lost their lives on Bolivia’s “Death Road” since 1998.
Thankfully we passed the challenge and made it to La Paz. What a blast riding on such an infamous road! The wobbly belly feeling as you glance a look at the huge descent a mere few feet from your tyres that scrabble for traction.
An absolute bucket list for riders and one I’m so proud to have completed.
Riding Bolivia with Novo Adventures
Operating from the heart of Bolivia they offer all-inclusive motorcycle tours and 4×4 rentals so you can truly explore South America. They’re also transforming lives in the local community with all profits funding drug and alcohol rehabilitation programs. More here: NovoAdventures.com
Check out riding the Bolivian Salt Flats too – here.
If you’re wondering what to wear for enduro and hard enduro to keep you safe then you’ve come to the right place. Here are my must have Leatt products keeping me protected.
Leatt protection and Kecks underwear
Partly bionic inside and out! With enduro riding holding its risks here’s how I keep my body as protected as possible… Given my history I know only too well how much it sucks having a broken body (see accident story) and so I know that I’d rather take a financial hit now and protect myself. Instead of waiting for something to happen, like blowing my knee out, and then wishing I’d just bought the right kit!
The body is our home for life so I want to keep mine safe…but I’m not going to let that worry stop me pushing it to its limits riding.
Note – all gear is unisex and not made for females so suitable for all enduro and hard enduro riders looking for the best body protection for their enduro riding!
Here’s the breakdown of my enduro body protection kit, I’m definitely a Leatt lover and you’ll have seen I’ve had some big falls and been OK 🤣:
Feet – thigh high boot and knee socks to prevent rubbing by Leattknee brace socks. I then wear the Leatt GPX 5.5 Flexlock boots. I find they are far more protective and supportive compared to my previous Alpinestars Tech 7 boots. The GPX offer much more durability, support and comfort to me.
Knee – Leatt X Frame guards for full rotation and hyperextension protection plus full impact. Before these I had the Leatt Dual Axis, less protection but still awesome for your first knee guard. I took the jump to full guards as I realised that knees are one of the most common injuries and can completely end your riding career, so I spend the money to keep them safer.
Booty – impact shorts to the highest impact rating for hip, thigh and coccyx that are low profile and fitted so no fat ass 😝 – Leatt shorts 3DF 5.0. Note, I found these come up small re sizing. I’m a UK 8 and have to wear the medium shorts as the legs are quite tight on the quad.
Upper body – LeattAirfit 3DF body armour including chest, back, elbow and shoulders with malleable protection so it’s mega snuggly to wear. Like a big cuddle of safety. I always wear the full protection, when I fall or catch a rock it means you barely even feel it, giving you confidence but most importantly, reducing injury and bruising.
Private area 😉 – kept nice and comfortable with men’s @kecks boxers. Absolutely dreamy even for a lady! Trust me! I previously wore just my normal underwear but realised, especially when adding impact shorts, that the Kecks boxers fit like a glove and prevent any rubbing. I hope they make a women’s pair soon as a few tweaks would make them far more female friendly. Use “VR15” for 15% off Kecks.
Eyes – I vital part of staying safe riding, I’ve found Scott Prospect are the most comfortable hard wearing and best at not steaming up. I use their light sensitive lenses so you’re always best equipped for the light conditions. These intelligent lenses change from clear to full sunglasses as you ride through varying light such as woodland or open spaces. For races I add the roll-off kit to keep my vision clear.
The twins 👙 – high impact sports bra. This is just a cheap Tesco @fandfclothing one which have proven to be my favourites, only £12!
Click here to see the kit list on Amazon to save you searching. I do make a small commission for any Amazon buys through their affiliate programme so thank you in advance if you do shop. It all helps me keep the content coming 🥰
Experience biking
freedom like nowhere else on the Salar de Uyuni, South America
My eyes flicker as
we approach a mysterious white mass of landscape. It’s something my mind simply
cannot seem to process as we ride off the end of the dusty dirt road onto the
Salar de Uyuni. My subconscious is racing through its memory bank, working to comprehend
the ground before me. It’s brilliant white, almost smooth, but rugged. My mind
instantly references snow and my body tenses, bracing for the imminent slip.
Ever wondered what 10 billion tons of salt looks like. This is it! 1 m thick and 4,085 square miles
But wait. It’s not
ice, this is the salt flats. Yet despite this realisation I’m fighting to
reassure myself that my Triumph Tiger’s tyres are going to grip this alien
surface. Before we edge further into the flats, which are nearly completely dry
in the intense sunshine, I simply have to stop and feel it for myself…
Swinging off the
bike, I expect to slip in the snow-like material beneath my feet, but I quickly
recalibrate my brain. The grip is incredible and the soles of my boots bite the
ground. The surface is not like snow or sand – it’s firm despite its
appearance. I remount and push forwards, with a new appreciation of how solid
the Tiger feels beneath me.
Now my mind can
focus on what’s around us – which is quite simply nothing! Like being at sea on
a calm day, apart from the odd dot on the horizon you’re completely alone. We
progress onto the 4085 square mile flats (100 times larger Bonneville in the
United States), and quickly lose perspective of space and time. Distances and
speeds become flattened by the lack of reference points in the landscape. But
we’re building confidence now, speed is up and we’re weaving around, darting
playfully with each other and the support truck.
Between May and
October the salt flats are completely dry in the middle with a crunchy crust
estimated to be one metre in depth. Formed 30,000 to 42,000 years ago, the area
was part of a giant prehistoric lake, Lake Minchin, which dried up leaving
behind a couple of seasonal puddles and several salt pans, including Salar de
Uyuni. There’s a lengthy dry season, but visit in January when the plain
experiences an average rainfall of 80cm, and you’ll be faced with a mirror-like
water base.
In May the dried
plain makes for a pretty solid but smooth ride, but you soon realise that there
are slushy areas which require you to push your weight back and float through
with the front wheel light, like you would on sand. Then there’s the random 1-2
foot bore holes, which need to be tackled at speed to prevent the bike from
nose-diving into them.
With a lunch reservation to meet, we push on hard. It really must be one of the only places on Earth where you can pin the throttle at 93mph (any faster and the tough terrain sent the bike into a rather uncomfortable wobble) and stay there for well over an hour, eyes locked to the medium size mountain on the horizon – our only bearing for direction.
Flags are planted by the worldwide visitors to the flats. If your flag isn’t there feel free to leave one
We’d been told we had a table for lunch so as we approach the Isla Incahuasi, a submerged historic volcano peak lined with gigantic cacti believed to be over 1000 years old, I was rather surprised to see our tour leader Andy ride straight past. I couldn’t see anything else for miles ahead and my belly was rumbling, please let it be a mistake. He pulls up to a random 4×4 and after a few rapid exchanges with the driver, switches off his bike. Why are we stopping? But then I spot it. Right there, in the middle of nothingness is a fully laid out table. Beers, salad and a huge array of meats. Did I just land in heaven? Talk about private dining, I’d pick this over a restaurant any day.
Lunch was laid out in the nothingness
Bellies full, we
jump back on the bikes and set off into the infinity pool of nothingness.
Weaving and twisting, our bikes dancing as we glide towards to the shadowed
outline of volcano Tunupa and our hotel for the night, Tayka de Sal. Turning
off-course and away from our fellow riders, I decide to take on a challenge;
over lunch our tour leader talked of a rider who rode for a minute with his
eyes closed, and, well, let’s just say I’m competitive… With guidance from my
husband over my intercom, I take the plunge, heart racing. It was 3.6 miles
later when I opened my eyes – five minutes riding blind! And on that note, we
accelerated off to our destination and began a climb of volcano Tunupa. What a
place. It really is like riding on Mars, and I never knew nothingness could be
so much fun!
The monument was built to mark the plain’s involvement with the Dakar rally
Novo Adventures run a 10-day tour to Bolivia, including the Salar de Uyuni, and all profits go to charities that support addiction recovery. A fully supported tour costs £4000 and includes, a guide, lodging, food, rental of a Tiger 800 and fuel. You will stay deep in the jungle, stay on the edge of the world’s largest salt flats, and ride in one of the most diverse countries in the world. www.NovoAdventures.com
When winter hits it’s cold, it’s wet, dark and it’s pretty
darn miserable but that also means it’s absolutely epic for enduro riding! The
wet slippery, muddy terrain is off road riding heaven. Well if you like that
kind of thing. For some this sounds more like their idea of hell so how about a
long weekend in the sunshine for some mid-winter riding?
Introducing ToroTrail in Spain. With a brand-new fleet of 2020 Husqvarna motorcycles, including four and two-stroke, it’s a moto retreat just a short drive from Malaga airport in Southern Spain. The Toro team have nailed the ultimate weekend offering for two-wheel lovers. Fly in, borrow all the kit, stay in the villa equipped with pool, hot tub and onsite catering for bacon roll breakfasts and fresh coffee, and then of course enjoy the epic riding southern Spain has to offer.
ToroTrail, Malaga
They even manage to nail the boring stuff. Imagine a safety
briefing that includes “Wheelies? We LOVE them…if you can do them. Otherwise,
don’t, you’ll die!” Giggles all round.
I’ve had multiple trips out to ´Torassic Park´ – named due to its rather spectacular entrance gates, and I simply can’t get enough. It’s an absolutely ace set up. ToroTrail have nailed the full package for the ultimate moto getaway from busy life at home. A short flight to Malaga and you’re in a beautiful Spanish villa with a pool and a fleet of new Husqvarna enduro bikes, all the kit and the ultimate riding terrain.
With endless terrain and a range of bike sides, including four and two strokes, ToroTrail can cater for any level of riders. From absolute off road newbies to experienced riders. No matter on your’ ability they guys will find the terrain to suit and have years of experience helping you improve your skills. Riding starts near immediately from the house giving a mix of large fire tracks, small single track, technical and sweeping riverbeds and more hill climbs and descents that you can shake a stick at. One of their really popular routes even takes you to the beach for a seaside lunch.
Summary
Lyndon, the man behind it all, is an absolute hero and has gathered together a fantastic team of very capable riders to make for the best experience. With full accommodation and all the desired facilities on site it’s incredible. If you’re wanting a long weekend away and some off-road fun, this is the place to go.
One thing to add, is that they also offer enduro tours in Morocco
and Portugal. I’ve only experience they Spanish tours and highly recommend.
Periodically ToroTrail get a pro rider in to combine an amazing Spanish riding adventure with some serious enduro learning. I was lucky enough to join an enduro training day with Paul Bolton!
Here’s my GoPro 7 headcam footage riding a stretch of riverbed doing hard enduro training in Malaga, Spain with Paul Bolton. We’re riding laps in the riverbed, watch me cut my time down and also some awesome falls and over takes by Paul! This was riding the Husqvarna TE 300i with ToroTrail.
Day 1 with ToroTrail
Day 2 with ToroTrail
Day 3 with ToroTrail
Day 4 with ToroTrail
Day 5 with ToroTrail
If you’re new to my page – it’s more than just dirt bike riding and racing, I’m on a mission to prove that nothing is impossible if you want it bad enough. See more about my story plus read about my life changing accident, which started it all.
I’ve done 50 hours riding the Husqvarna TE 150i over the last two months, including enduro and trail riding, a little motocross and technical hard enduro in a range of conditions.
In a nutshell this is a highly capable machine, it’s light, agile and ready to give you confidence in a heap of conditions. So let’s go into the details.
The TE 150i is a pocket rocket not to be underestimated!
Capacity
First
thing that comes to mind is people’s reactions towards it ‘only’ being a 150….
Now this is a very important part for me, just because it’s small it certainly
doesn’t mean it’s not capable, exciting and fast. Modern fuel injection engines
offer such huge advancements in technology that the classic ‘size’ chat is
becoming something of the past in many ways.
Size matters hey? Which would you pick
The Husqvarna TE 150i is an incredibly smooth engine and with a 54.5 mm stroke, the crankshaft is perfectly balanced to reduce vibrations making it a non-fatiguing bike to ride. If you’re looking for enduro or MX it’s a punchy machine with plenty of acceleration [note for MX you’re best on a TC or FC].
You do need to calibrate to the 150i because for technical riding keeping the bike in the powerband means you really have to ride it, you’ll be shifting through the gear box and keeping it in the power band more than on a larger bike. But being able to really work the machine is a fantastic skill development and doesn’t lose you time. A small negative when we think about the advantages of it being such a small machine.
Husqvarna have worked incredibly hard on this new generation of bikes to get the weight down and the 150i weighs in at just 99.6kg pre fuel. That’s only 50% heavier than me! It’s also a very narrow machine all over including the tank and seat, boosting that small feeling.
With
such a streamline lightweight bike you’re going to find the power goes
considerably further, you’re carrying less around for a start. But this also
gives a massive confidence boost. It’s more like a mountain bike, you feel able
to throw it around, leaning it over to find traction, manoeuvre it without
using so much energy, and tackle obstacles with less worry about the pick up
when / if you drop it.
Alongside
this, is it’s incredible low seat height at just 96cm. I’m 172cm and can easily
get ground contact on either side. Another great confidence booster.
Light, lean and low.
One of the key areas I suspect this weight has been lost is in the frame. Husky have created an injection moulded fibre reinforced plastic subframe, moving away from the more traditional aluminium subframe.
Photo by Phill Hodges
Quality
Lots
of little things shine with the Husqvarna in terms of its beautiful build
quality. For example, the simplicity of having some of the torque value
settings imprinted on the bike. It’s simple but saves times with manuals
hunting settings. What I’d love to see next is oil volumes printed and more
torque settings.
Machined
triple claps, a really solid robust set of plastics that are built to a super
high tolerance. It’s apparent when installing or removing.
I
love that it has a kick start and the electric, I’ve never actually used but
it’s nice to know it’s there.
My
only qualm would be the headlight design as it sticks out rather a lot making
it vulnerable to impact…which is exactly what happened to mine. Oops.
Suspension
The obvious quality for Husky is their rising rate linkage system. It’s a progressive system, so the more force you put on the harder it gets. The advantage is it will absorb the small bumps at low speed and the larger high-speed impacts with considerable more ease. The downside is the linkage is a little vulnerable with your ground clearance, however the clearance is only 10mm less than the KTM and also a small guard can give it all the protection it needs for bottoming out on rocks and logs.
Husqvarna linkage suspension protection
Fuel injection
As
a transfer port injection bike the benefits are clear: besides huge
improvements in fuel efficiency and exhaust emissions, the system also removes
the need for pre-mixing fuel and re-jetting, meaning that with less effort, the
engine always runs smoothly and crisply.
An
example of how this can help would be high altitude riding where the air
pressure changes, the bike will intelligently adjust the mapping using the barometric
pressure sensor to ensure optimised performance.
The
move to TPI was to meet new Euro 4 emissions but of course has all these
benefits.
With these details I would definitely say the Husqvarna is a clear winner for me.
I’ve also completed the Valleys Xtreme hard enduro, arguably the toughest in the UK, and not once did I feel I was lacking umph on the TE 150i. It’s lightweight nimbleness had me finishing silver in my first ever hard enduro.
Photo by Phillip Hodges
Final Verdit
So there it is. That’s my thought on the 2020 Husqvarna TE 150i. It’s an incredible bike for confidence building but also highly capable. Ideal for expert riders or people wanting to advance their skills, especially for people on the smaller side or women or anyone after a pocket rocket.
Guaranteed fun, but beware your friends will have bike envy!

 WilTech lift