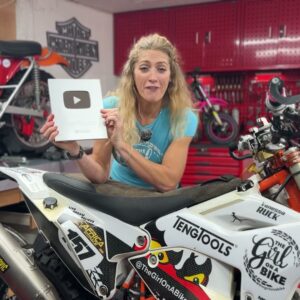
KTM 200 EXC 2-stroke bottom and top end engine rebuild videos
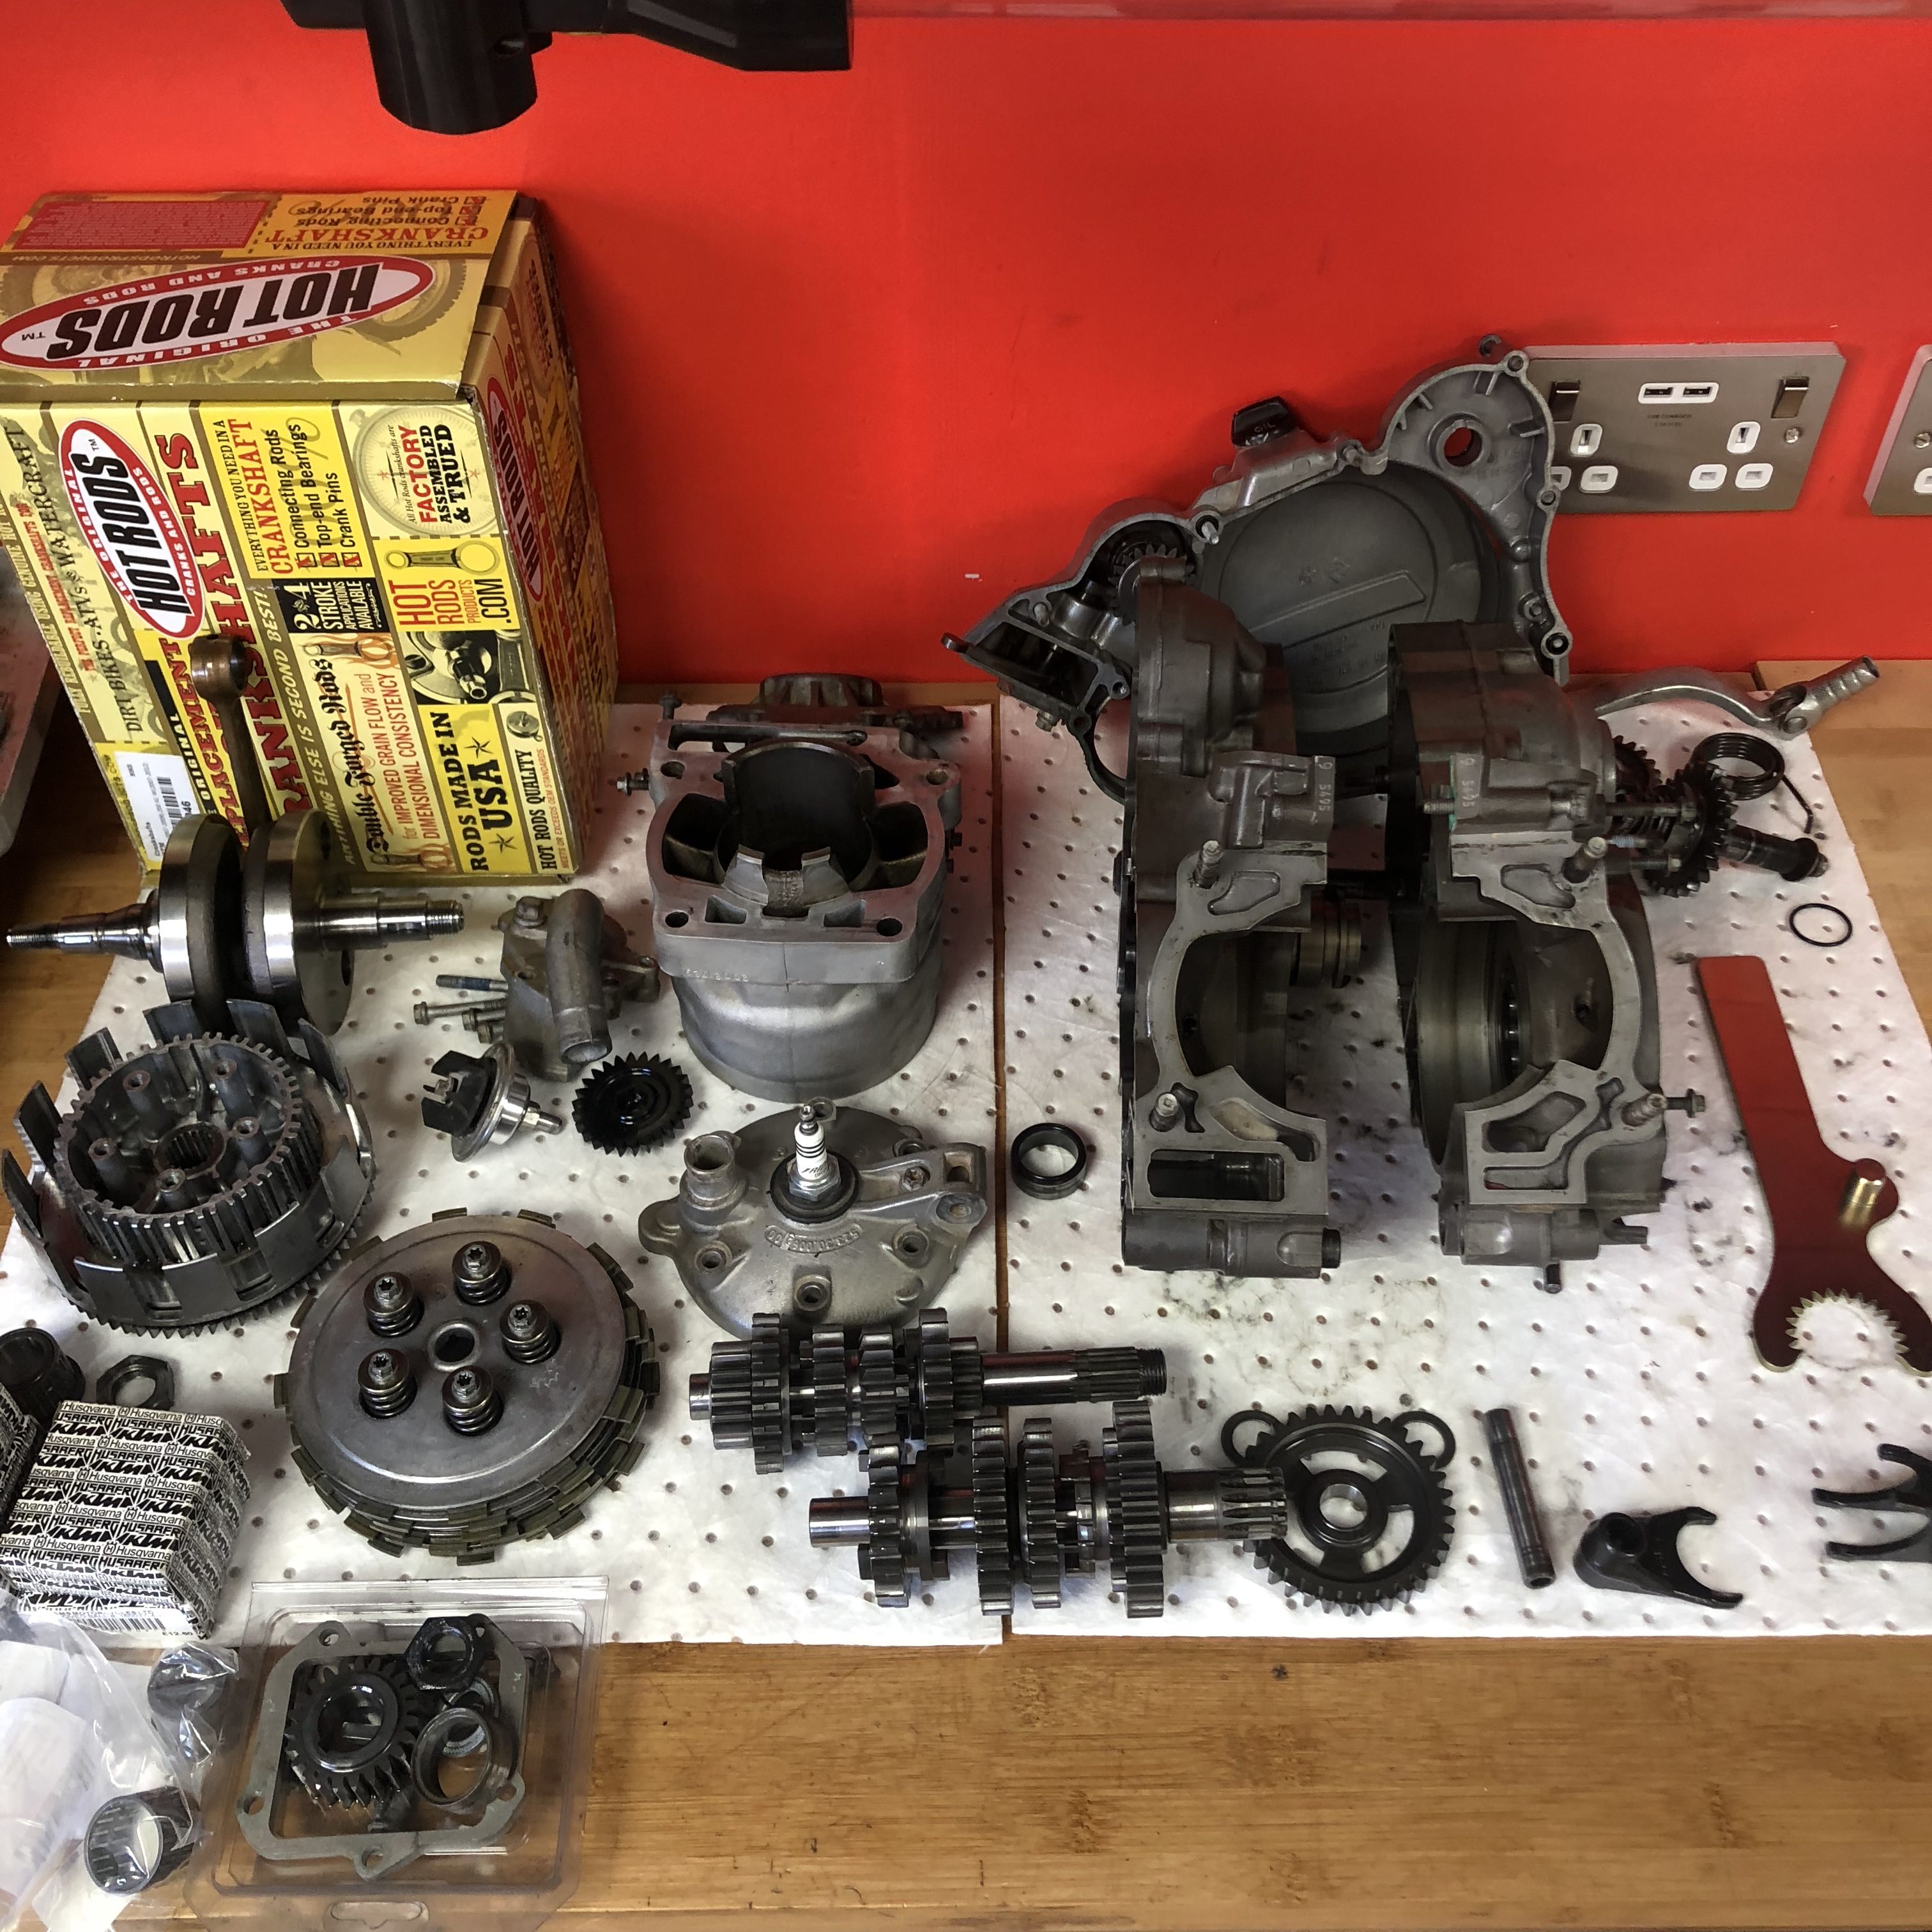
Watch a full engine rebuild of a 2-stroke KTM EXC bottom end and bottom end. Including getting the transmission, gearing, the crank into the cases, piston, seals and getting it all together.
Bottom End
Top End
It shows how easy it is to do, I learned from the manual and YouTube. If I can do it, you can do it!
If you’re new to my page – it’s more than just dirt bike riding, Harley’s and racing, I’m on a mission to prove that nothing is impossible if you want it bad enough. See more about my story plus read about my life changing accident, which started it all.
Bucket List – motorcycling must-dos – Ride the best of the Alps with Tour1
Europe’s best alpine passes strung together into 2,200 miles of touring heaven
As published in MCN – Vanessa Ruck the high-mileage Harley-loving MCN blogger and Instagram addict talksTour1
Some of the world’s most spectacular roads and stunning views are waiting just a short hop away across the Channel. Plunge deep into the Alps and you will soon lose count of how many times you mutter ‘wow’ to yourself as mountain passes, cyan lakes, endless switchbacks, aggressive climbs and plunging descents unfurl before you around every turn. It’s an addictive riding heaven of snow-peaked mountains, raging waterfalls, rolling highlands and epic skyscapes.
Boarding the Channel Tunnel at Folkestone and throttling across France, Belgium and Germany is hardly a dull schlep, either. The tour route takes you down the stunning B500 (itself an MCN Bucket List ride), and delivers you through endless ribbons of tarmac wrapped in stunning scenery. It’s the ultimate aperitif to a tarmac glutton’s main course.
But when you’re undertaking a 2000-mile-plus road trip like this it’s easy to get stressed out. Have I picked the best route? Are the roads going to be as good as I hoped? Will the hotels be alright? Can I handle the distances between stops? What if I miss the best passes? You can bypass all this though, and book a guided tour with Tour1 – as we did – allowing you to simply concentrate on the ride of your life instead.
The Tour1 guys recce everything for you, research all the best routes, test the hotels and pick the ultimate roads, restaurants and coffee stops to make your 13-day ride as perfect as possible. They’ve done the routes so many times that they take the stress out of contingency management, too. Say your Euro Tunnel is delayed by four hours (yup, that happened), they know how to get you back on time with the group. Or what if a landslide closes a mountain pass (yes, this happened too)? You can simply put your feet up with a coffee while they’re planning an equally impressive alternative route. The only variable no-one can plan for is the weather, but in the Alps that can change between passes, let alone days – meaning that the ever-changing landscape comes with equally changeable micro-climates.
In the UK you can get onto a beautiful road littered with sweeping turns and breath-taking scenery, but before you’ve really settled into the flow, the road runs out. Go to the Alps and you can have this all day, every day. If you pick the right tour route you’re going to be immersed in some technical and challenging riding, too. Take the Stelvio Pass, the third highest pass in the Alps. At 9045 feet, it offers 75 hair-raising hairpins and views that will make your stomach lurch. Or the Passo di Gavia – listed as one of the world’s most dangerous roads. It’s a single-track assent with oncoming cars, bikes and bicycles, potholes galore, gravel, rock slides and unpredictable weather. For some it’s the ultimate challenge, while for others it was a risk too far – but no-one is forcing you to tackle the climb. Then there’s the historic St Gotthard Pass in Switzerland. While it’s not a fast road it is both challenging and breath-taking with its cobblestone hairpin bends. Initially, I was wobbling around like a new-born Bambi, uneasy on the uneven surface, but after stringing just a few switchbacks together I started to realise how much grip was available, and it turned into one of the highlights of the tour. But there are many more passes that are just as good without having achieved such fame or notoriety, and even the roads that connect the passes are often gorgeous valley sweepers that ebb and flow through towns and lush lowlands, providing a welcome breather before the next dramatic ascent.
There’s confidence and safety in numbers, too. Our gang of 15 thudding Harley-Davidsons was pretty difficult for drivers to ignore, and the range of experience and skills in the group meant we always had a solution for every eventuality.
As you tick off legendary passes, you’ll also be racking up the countries. The tour threads its way through nine in total, and the transformation of cultures as you cross each border adds a subtly different flavour to each leg of the trip. From gorgeous Swiss mountain lodges, to chiming cow bells and lederhosen in Austria, and seemingly infinite local beers to enjoy after a day’s riding – traveling on a motorcycle gets you closer to every country you ride through.
Along with the incredible engineering of the mountain roads comes a refreshing exposure to the opportunity for natural selection to take control, too. High-altitude passes with sheer drop-offs and no guard-rails, totally exposed hairpins, and the occasional rockslide, herd of cattle or throng of Lycra-clad cyclists adding to the road surface challenges. It’s liberating riding in a place where your safety isn’t cocooned by the health and safety police. It’s sensory overload, too, as the potential for disaster spikes your pulse with adrenaline while your eyes struggle to drink in the scenery, and you try to ensure you don’t start fixating on the drops. It’s a riding nirvana that leaves you really feeling like you’re living on the edge. Quite literally.
Don’t miss…
The B500 through Germany’s Black Forest on the way South.
Cobblestone hairpins might not sound appealing, but it’s a rare treat, and you’ll have to get used to it to ride the fantastic St Gotthard Pass
Taking a swim in a mountain lake – it will burn like hell because it’s so cold but it’s unmissable.
The Passo di Gavia pass – a single-track mountain pass that will scare and thrill in equal measure.
Do it on a bike made for the mileage, my Harley-Davidson Softail Sport Glide sucked up the miles – see bike full review.
Top tips for touring happiness
Research the tour, scroll social media of previous trips, read into the details thoroughly and make sure the route, schedule, and likely companions are your cup of tea.
Pack light! You don’t want to fill every inch of your panniers or be strapping bags on every day. You have to carry everything with you each day, so the less clutter you carry, the happier you’ll be, and the better your bike will handle.
Pack your swimmers – some hotels have pools but they can’t compete with a dip in an ice-cold turquoise mountain lake in the shadow of the Dolomites.
Do some loaded practice rides. Riding 150-200 miles per day for 13 days on the trot soon adds up. Do a few long weekend rides to get your body used to spending a lot of time in the saddle.
Tour1 is an official Harley-Davidson tour operator with trips in US, UK and Europe. For more information on their tours check out www.tour1.com
The route, 13 days, 9 countries
Our tour was ‘Altitude with Attitude’ with Tour1, and is aimed at riding fantastic mountain passes the best bits of Switzerland, Italy and Austria. That means legendary passes such as the Stelvio and Grossglockner Pass, plus 33 others! The tour includes your route down to the Alps and back again, too – which is a great ride in itself. This is Tour1’s most dramatic tour, for experienced riders who want a real adventure on twisty roads on a Harley-Davidson.
Fact File
Distance: 2160 miles [from Folkstone]
2019 Prices start from £2225 for rider sharing a room
Two riders sharing a room, price each £2225
Single rider in his/her own room £2855
Rider and pillion sharing a room £3595
Prices include Eurotunnel crossing, all accommodation (3 and 4 star), and some meals.
Get in touch via Instagram if you have any questions.
Here’s some video from my trip with Tour1
If you’re new to my page – it’s more than just dirt bike riding and racing, I’m on a mission to prove that nothing is impossible if you want it bad enough. See more about my story plus read about my life changing accident, which started it all.
Riding in Europe opens so many opportunities for finding epic roads. One I highly recommend is the historic St Gotthards Pass. While it’s not a ‘fast’ road it certainly is challenging and breathtaking with the cobble stoned hairpin bends. I’ll let the video do the talking!
If you’re looking for the best roads in the Alps then The Gotthard Pass or St. Gotthard Pass is definitely one to hit! The pass elevates to 2,106 metres and is a mountain pass in the Alps traversing the Saint-Gotthard Massif and connecting northern and southern Switzerland. It’s super unique with its cobblestones surface, even in the hairpin curves, making for an mega enjoyable ride.
If you’re new to my page – it’s more than just dirt bike riding, Harley’s and racing, I’m on a mission to prove that nothing is impossible if you want it bad enough. See more about my story plus read about my life changing accident, which started it all.
The 2018 Harley-Davidson Sport Glide has definitely won my heart and as so many have asked what I think, here’s my review on this new breed of Harley-Davidson:
I conducted my Sport Glide review on a 2,700 mile road trip with Tour1 starting from the UK, heading across 9 European countries, completing over 35 mountain passes, motorway, winding roads and more hairpins than you can shake a stick at.
The Sport Glide offers a big bike in a small package with the new 107 Milwaukee engine (1745cc) laying down 83bhp prior to any upgrades [I’d absolutely love to try one with a Stage 1 and some feisty Vance & Hines pipes]. The power is on tap and delivers plentiful torque for passing on hairpins or blasting past Sunday drivers. I always felt like she had so much to give!
Feel
Despite the size, weighing in at 317kg, Harley have done a superb job of distributing the load. The bike feels light and agile, especially compared to my similar weight 2015 Street Bob, the load is low making for a really nimble ride. Easy for smaller riders to handle yet big enough for everyone. The light feel means it’s easy to push round corners for some peg scraping enjoyment and the V-twin motor drives out of bends and past dawdling motorists with ease.
Comfort
The ride comfort is like no Harley I’ve ridden, smooth and refined. Two balance shafts are calibrated to perfection giving a super smooth ride but with just the right amount of energy to keep its Harley soul as you potato-potato along. Character and comfort perfectly refined. With the mileage we did on alpine roads I have to say I was super content. The riding position and forward controls just felt perfect, equipped with the new suspension that sucks up the terrain. And considering we did some cobbled mountain passes and Italy’s rather pothole riddled roads, I was very pleased with the suspension. For the motorways the modest fairing does a surprising amount too, I felt protected, allowing for minimal wind fatigue.
Look and feel
The craftsmanship is fantastic, tidy welds, extensive use of steel, deep gloss paint and the beautifully engineered panniers, it just screams quality and worth a good chunk of change.
When it comes to design she’s definitely a head turner too. Elegant lines combined with a stocky road presence. The clever quick release panniers, luggage rack and fairing mean you can quickly go from touring to cruising mode too. I really do think it looks fantastic and was rather tickled by how much attention she received.
Synopsis of my Harley-Davidson Sport Glide review
I could see myself happily commuting with its practical luggage, while being a head turner for cruising and yet also offering great comfort for the longer tours. With 2,714 miles together on Tour1, I can vouch first hand.
The sad moment I had to give the 2018 Sport Glide back to WMB [We Move Bikes]
Yeah, it’s not going to be for everyone, but I can’t stress enough how I wish more people would try a Harley before deciding they’re not for them. This guy is a beast 💖
If you’re new to my page – it’s more than just dirt bike riding and racing, I’m on a mission to prove that nothing is impossible if you want it bad enough. See more about my story plus read about my life changing accident, which started it all.
I guess my discovery of the CTEKbattery sense started in the same way that most people fall out with their motorcycle. A beautiful morning, the whole landscape was bathed in the warm glow of the rising sun. The perfect day to ride to work on my Harley-Davidson. It was also a rather important day as I had a job interview. I was a little nervous but I kitted myself up, prepared my mind and headed out to the garage. This was where it all went wrong. Thug, my Street Bob wouldn’t start. Totally flat battery! And I had even started her the night before to check all was ok…. Argh I’m going to be late. I tried to get her going, ‘sputter, sputter, sputter’ and nothing. We weren’t going anywhere.
I assessed the time and decided to plug her in to charge in my CT5 Powers Sport charger and give her a ten-minute boost. Unfortunately, I tried a little too early and without enough juice to turn her over fully I just drained the battery again. By this time, I had no choice but to ditch the bike and go in the car…but I was in bike kit! You can rock up to an interview in bike kit on a bike but in a car you just look silly…. I had to change.
Anyway, long story short…
My bike wouldn’t start because of a flat battery… I had to call ahead and say I was running late due to a vehicle issue but I eventually made it ten minutes late.
I’ve always been really good with my battery maintenance, periodically using a trickle charger and doing battery reconditioning but this morning I knew I needed to do more. The disappointment of getting out to the garage and not being able to ride because of a flat. That sucks. It’s totally preventable so I made it my mission to find a solution…
You might wonder how you can rock up for an Account Director role in a marketing agency in bike kit, so I’ll divulge. With Bowtex Kevlar leggings you can wear any clothing and have all the protection underneath in the protective base layer. Add my smartest jeans over the top, my bad ass but smart HD-Footwear boots, a nice shirt and suit jacket and of course my leather Richa jacket. Boom, dressed for an interview. Oh and I got the job!
What is it
It’s a small unit that you wire into your vehicle battery and secure under your seat or another concealed position. This little device then monitors your battery state and pings the data straight to your smart phone. You might wonder why bother? Ultimately batteries can get sick, drain of power or die all together, but with the right battery maintenance you can make your battery performance last longer and be considerably more reliable – meaning a more dependable bike, less breakdowns and less money on batteries over the years. The challenge is knowing when your battery needs some extra love. Batteries don’t have a status panel and generally don’t warn you that it’s struggling until it’s too late and won’t fire up your ride.
This smart battery management device gives you the power in your smart phone to know what your battery needs by tracking the health of your battery. The apps free and will update every time you’re in range for Bluetooth [iPhone or Android App].
Another cool thing about it is the ability to have multiple devices paired to the one app, which means if you’re lucky enough to have multiple bikes or vehicles you can sync them all up.
Ease of use
All the data is presented in a really simple visual display within the app; % of battery charge with colour coding, which also directly tells you the action required:
Sad Red – charge now
Warning Yellow – charge soon
Happy Green – Battery ok
You can then see your batteries % history plotted on a graph. This is great for seeing how the deterioration of the battery has happened over time. If it’s a sudden drop in charge you can probably relate it to something being left on draining the power, a steady decline could highlight a battery in need of reconditioning, but a gradual line could simply be a result of being sat for too long. All of which, depending on the severity of the deterioration, can be helped using a CTEK CT5 Powers Sport charger [more to follow on this].
One of my favourite parts of the battery sensor is the alerting function as I’m honestly not going to remember to check my battery regularly – even with a clever app! The app is programmed to warn you of actions so if your battery status changes or reaches a critical level the app will give you a push notification. Similarly, when it’s not managed to connect for 7 days you’ll get a heads up. You can then reconnect and the historical stored data from when you were away will load up too. Never get to your bike and find a flat battery again!
Stats given:
% percentage of battery charge
Direction on actions required [charge now or soon]
Battery temperature [in centigrade or Fahrenheit – 0 °C = 32 °F.]
Voltage
The Techy Bits
Suitable for all car, motorcycle and engine starter batteries 4.5AH or over
Compatible with Android OS 4.4 and higher, iPhone iOS 7 and higher, Bluetooth® 4.0
Easy to understand smart phone application and monitor with free app download
Can sync with multiple monitors to keep on top of all your vehicles
Stores up to three months of stats.
Notifications if battery’s state of charge falls to a critical level or if measurements not taken for seven days
2-year warranty
Limitations
As it’s Bluetooth you have to be within range of your bike. For me, my garage is a little too far away from my house to get the stats without heading out. But I do walk past it every day coming and going and get the latest info.
It’s not a limitation of the product so much, but for me on my Street Bob I did have to wiggle about a lot and shift my wiring to get the small device to fit on the battery – probably because I have a few accessories already. I got it working no dramas but you might have to squeezy and tidy a little.
£££
They are on the pricey side at around at around £40-50, however it’s about the price you put on being able to ride and for me having an automatic alert if my battery is needing attention is worth every penny. Avoiding the disappointment of a ‘sputter, sputter, sputter’ is worth every penny. Also, by monitoring your battery condition, you can prevent a deep discharge occurring, which will result in loss of performance and early replacement.
Highlights
Works on all 12V batteries (lead acid)
Ensures your battery is ready to go when you are
Battery status data straight to your smart phone
Tips From Experience
I highly recommend getting the CT5 Powersport battery charger with priority, if you’ve got to choose, get the charger over the sensor. With bikes I find they can sometimes be left un-ridden for weeks [winter, holiday away, life being too busy etc.] and so you can leave this plugged in and know that your ride will be ready to go when you are. It’s designed specifically to charge and maintain batteries with three fully automatic charging and maintenance programs – Normal, AGM and Reconditioning. I’m in the habit of having it permanently connected when parked up, it’s designed to be so it won’t over or under charge. It’s easy to use and works with all types of powersport 12V lead acid batteries. It’s kind of magic how a totally dead battery that you thought was only destined for scrap can be fully reconditioned and live on reliably after a CT5 revamp – saves you money on battery’s.
Overall Rating
Small but highly powerful and practical device giving you the confidence that you’re ride will be ready to go when you are. Looks after your battery for the longest life possible to give the most reliable performance so that nothing can come between you and that adventure.
If you’re new to my page – it’s more than just dirt bike riding and racing, I’m on a mission to prove that nothing is impossible if you want it bad enough. See more about my story plus read about my life changing accident, which started it all.
Want to wear your normal jeans on the bike and still have protection? Keep reading
How it started
As a biker one of the things I found the most frustrating was either having to look like a biker in all the leathers or having to get changed all the time. Leathers to normal clothing and back again. There had to be a solution where you could wear something more normal. In comes Kevlar jeans. Amazing, now you can wear normal looking jeans and be safe, but you’re still restricted to that look. A single pair of jeans – unless of course you’re a lucky owner of a money tree and can have multiple pairs.
I was dreaming of total freedom in what I chose to wear while also being safe. That’s when I discovered Bowtex Kevlar leggings. These give you the protection you need in a base layer legging, giving you the unlimited choice of wearing whatever trousers you fancy. The end of looking like a biker and the start of being able to wear whatever you like.
I do find it funny how many disapproving looks you get for riding in your bright purple Calvin Clein jeans…being judged that you’re being reckless but little do they know – underneath I have woven Kevlar to save my skin. Protected!
There are so many companies making protective riding jeans that are designed to offer impact and abrasion resistance should the worst happen. However, this base layer system with the same level of protection, is something offered by Bowtex and only a few rival brands, I really think, is going to catch on.
So how to I rate them?
Safety
Bowtex have been making their leggings with safety front of mind, which is exactly what you’d expect. The main portion of the leggings is made from a blend of DuPont™ Kevlar®, Protex and cotton to provide protection against abrasion, heat and flames, while also giving the comfort. They are further strengthened by 100% woven Kevlar on the high-risk areas including the hips, bum and knees – the areas where you’re most likely to inflict prolonged contact with the ground in a fall or crash. And, you then have the added option to have industry standard D30 armour as the leggings come with pockets ready.
That’s abrasion, heat and impact covered – and all in a pair of leggings! Yes, if you come off your jeans on top will highly likely be written off but you’ll be happy in the knowledge that your leggings are going to keep your skin on and absorb some of the shock!
Full Protection – Bowtex® Kevlar Leggings Yellow. Full Dupont™ Kevlar® Fibre
Bowtex® Kevlar Leggings
Base Layer: 55% Dupont™ Kevlar®, 25% Protex-M, 20% Cotton
Added patches on high risk areas: 100% Dupont™ Kevlar® for pure Abrasion Resistance
Unisex
Built-in hip and knee pockets for Bowtex® impact protectors.
For me, having been in an accident I won’t even jump on the bike for a pint of milk without the right protection and clothing like this makes being protected so easy. It’s a no brainer.
One thing to note is that Bowtex have a couple of legging options. I’m talking about their yellow leggings, which offer the full Kevlar protection. They also do a commuter version for lower risk riding at a lower cost. The commuter leggings have a lower Kevlar portion, replaced by elastane and polyester. The result is a more flexible legging for swift and frequent changing, however these do of course offer lower protection as you’re only protected in the high-risk areas. Personally, not a pair for me but worth mentioning.
Added patches on seat, hip and knee areas made with 100% Dupont™ Kevlar® Fibre for abrasion resistance
Unisex
Built-in hip and knee pockets for Bowtex® CE rated impact protectors.
[/box]
What I love is that Bowtex trust their kit enough to make an ace video of a guy being pulled down the road on his bum:
Look & Styling
This is down to you! Bowtex give you the protection as a base layer so you can literally style out in whatever jeans, trousers, chinos or pants you like. Hell, you could even wear a skirt if you wanted [it might look a little odd but you’d be protected!
That’s the beauty of having leggings, you have the control of the top layer.
Rock up on your bike in your normal clothing, I love that!
The Girl On A Bike motorcycle Bowtex logo unisex Womens kevlar leggings jeans 6
The Girl On A Bike motorcycle Bowtex unisex Womens 100 kevlar leggings jeans 7
The Girl On A Bike motorcycle Bowtex logo unisex Womens kevlar leggings jeans 5
Any extra swaying point for me was the limited choice of Kevlar jeans on the market. Yes, is has expanded hugely in the last couple of years, but you’re still limited to set styles, designs and colours. Having a legging opens the breath of causal jeans to your bike wardrobe.
If you’re like me and love your super skinny spray on jeans, it’s important to note that not all your jeans will fit over the top. While the leggings are super streamlined they are still a layer to squeeze into your jeans. This will most certainly apply if you add the armour too.
Ride Comfort
With the almost fluffy woven Kevlar material and a nice thick elastic waist and ankle bands these leggings are super comfortable. For me the stay firmly in place, not riding up my legs or sliding down when I bend. They flex and twist with you. My ideal would be having them slightly more elasticated for a snugger fit under my spray on jeans, however they are still offering superb comfort under your jeans. What’s also great is that they form an extra layer for warmth in the cooler weather while also being highly breathable in the summer.
I’ve got no complaints over comfort.
Limitations
Not waterproof but what legging is…you could wear waterproof jeans or I simply carry a small pair of waterproof over trousers if there is any rain risk. Easy!
The material is not super elastic, if it was it would give a slightly snugger fit but it’s not essential.
As a base layer you naturally need a little more space for your jeans to fit, unlikely a problem unless you love your spray on jeans
£££
For a pair of protective motorcycle trousers their mind market on price, however with that you get a huge array of flexibility to wear whatever kit you like.
Note your cost will be the leggings plus whatever you opt to wear on top.
Remember, you get what you pay for. Buy cheap Kevlar and you’ll get cheap Kevlar.
Highlights
Expand you bike wardrobe and rock out in whatever jeans you like but fully protected
Comfortable and flexible
Breathable and protective
Tips From Experience
If you love your super skinny spray on jeans then be cautious about whether a pair of leggings will fit below. I simply wear slightly looser styles over the top to give a little more space.
The yellow Bowtex leggings offer the full Kevlar protection, however they also do a commuter version for lower risk riding – their black leggings.
Overall Rating
If you’re a trend setter, someone who loves their jeans, or simply haven’t found a pair of Kevlar jeans you’ve taken to, then these are for you. With these you can rock any style you want on top and still be assured of protection.
If you’re new to my page – it’s more than just dirt bike riding, Harley’s and racing, I’m on a mission to prove that nothing is impossible if you want it bad enough. See more about my story plus read about my life changing accident, which started it all.
Ultimately my desire to take the angle grinder to my precious Harley-Davidson Forty-Eight Sportster started when I saw shots of bikes who had received similar treatment. The raw, rugged and slimmed down look just caught my eye, it looks SICK!” How do I do this myself I thought? A bit of digging on the internet and I was all set. So here’s the how to do a home custom cam case chop on your Harley-Davidson.
It’s worth noting, HD engines do not have overhead cams like modern motorcycles, the valves are driven by cams located next to the crank shaft. This is why you can see the sexy cam pushrods mounted in parallel to the cylinders, stretching up to the cylinder head valves. Also, as modern bikes have timing managed through the ECU, the timing cover is redundant, it’s purely there for classic old skool looks.
The Girl On A Bike Motorcycle DIY Harley Davidson forty eight sportster cam chop customisation before
The Girl On A Bike Motorcycle DIY Harley Davidson forty eight sportster cam chop customisation complete 1 e1517417931974
Remember, I’m an account director in marketing…not a mechanic or engineer…so if I can do it. You can do it! Give it a go and give me a shout if you have any questions.
Tools Needed
Angle Grinder + appropriate safety equipment (goggles, gloves and mask)
Spray paint – 98606BF Noir Texture Harley-Davidson engine paint [or the paint that matches your bikes cam cover]
Metal files, ideally a coarse and fine file
Wet and dry sand paper
Ruler and tape measure [right angle locking ruler is ideal]
Appropriate tools for bike assembly
Full how to video and detailed written how to below
The Recipe
Pick your look
Before you get the angle grinder near your ride I suggest having a good look online for some cam chop shaping options. There are some great designs out there, from simple and minimal like mine through to rather fancy and intricate. Here are a few example looks, you can tell Warr’s London customs have been an influence for me:
The Girl On A Bike Motorcycle DIY cam chop customisation design ideas 5
The Girl On A Bike Motorcycle DIY cam chop customisation design ideas
The Girl On A Bike Motorcycle DIY cam chop customisation design ideas 4
The Girl On A Bike Motorcycle DIY cam chop customisation design ideas 3
The Girl On A Bike Motorcycle DIY cam chop customisation design ideas 2
The setup of how the cam case mounts onto the bike means there is some dormant areas. It’s vital to ensure the gasket seal is retained to allow the engine to operate as normal with the customisation, but there is a large area of dormant material that’s not actually fundamental to the operation of the bike. That is the bit we are going to be removing.
Drop the oil
As we’re going to be removing the cam cover and gasket we need to drop the engine oil out of the bike. Same as you would for routine maintenance. Unsure how, ask Google or this guy might help too.
Do not skip this part…or you’ll have an oily mess…
Prepare to remove the cam case
Before we remove the cam cover and the sprocket cover there are a few parts in the way.
First off, you need to get the exhaust pipes off. Depending how frequently you remove them I’d recommend giving the bolts a quick soak in WD40, hopefully they’ll come off nice and easily.
Secondly, you need to remove the brake push rod linkage. Two little bolts at the front and the circlip and bolt in the middle should get them out of our way. Pop the bolts back in so you don’t lose them or forget where they go.
Create cardboard template for Cam Case bolts
Here you’ll be faced with a large number of bolts and it is really important that they go back in the same place. Grab a piece of cardboard and roughly draw the shape of the cam cover to mark the bolt orientation. This gives you a template with the same positioning of the bolts, which means you can pull them out, put them into the template and when you come to put them back together you will know which one is which.
The Girl On A Bike Motorcycle DIY Harley Davidson forty eight sportster cam chop customisation bolt tempalte
It’s important to remember which bolt goes where – use the template.
Remove the cam case and sprocket cover
Carefully loosen all the bolts and place into your template. Use a soft mallet to gently tap the gasket to break the tight seal. You then need to remove the oil hose clip – a small flat head screw driver should allow you to loosen the clip to enable us to slide the hose off.
The Girl On A Bike Motorcycle Harley Davidson forty eight sportster cam chop custom remove case 1
The Girl On A Bike Motorcycle Harley Davidson forty eight sportster cam chop custom remove case 1 1
The Girl On A Bike Motorcycle DIY Harley Davidson forty eight sportster cam chop customisation remove oil union
The Girl On A Bike Motorcycle DIY Harley Davidson forty eight sportster cam chop customisation oil union
Cover the exposed engine while you work
Use a lint free rag to pick up any of the residual oil. Cover the exposed engine and cam gearing system to prevent any dust or dirt getting in. I recommend standard kitchen cling film or saran wrap. Nothing special.
The Girl On A Bike Motorcycle DIY Harley Davidson forty eight sportster cam chop customisation protect engine
The Girl On A Bike Motorcycle DIY Harley Davidson forty eight sportster cam chop customisation protect engine1
Prepare cam case for chop
Remove the oil pipe union with 7/16th spanner and cover the whole cam case with masking tape. The tape will simply protect the surface from any risk of damage or scuffing.
The Girl On A Bike Motorcycle DIY Harley Davidson forty eight sportster cam chop customisation protect engine oil union
The Girl On A Bike Motorcycle DIY Harley Davidson forty eight sportster cam chop customisation masking tap 1 e1517415597609
The Girl On A Bike Motorcycle DIY Harley Davidson forty eight sportster cam chop customisation masking tap 2 e1517415574470
Measure and mark you lines for angle grinding
Carefully mark and measure where you want to reprofile your cam profile. I opted for a 5mm clearance from the gasket seal for a slimmed down look. Remember the angle grinder will make a wide cut line so be careful not to go too tight.
Measure on the gasket dimensions, add 5mm as a safety margin. I used a right-angle ruler, which enables you to lock on a desired measurement. Lock you ruler and flip the cam case over to mark this on the other side. Complete this at multiple points along the cam case and join them together for a clearly marked cutting line.
The Girl On A Bike Motorcycle DIY Harley Davidson forty eight sportster cam chop customisation measuring cut lines 1 e1517405376873
The Girl On A Bike Motorcycle DIY Harley Davidson forty eight sportster cam chop customisation measuring cut lines 3 e1517405356320
The Girl On A Bike Motorcycle DIY Harley Davidson forty eight sportster cam chop customisation measuring cut lines 4 e1517405399858
The diagonal corners will be marked once the first straight cuts are complete.
Double check measurements
Angle grinder
Clamp the cam case gently in a vice to ensure nil movement and then carefully cut along your marked lines with the angle grinder. Remember to always use correct safety gear.
The Girl On A Bike Motorcycle DIY Harley Davidson forty eight sportster cam chop customisation angle grinder 3
The Girl On A Bike Motorcycle DIY Harley Davidson forty eight sportster cam chop customisation angle grinder 2
The Girl On A Bike Motorcycle DIY Harley Davidson forty eight sportster cam chop customisation angle grinder 4
The Girl On A Bike Motorcycle DIY Harley Davidson forty eight sportster cam chop customisation angle grinder 5
Mark the corner lines & cut them off with the angle grinder
Continuing with the slim profile, I opted for a 5mm spacing on the corners as I was not worried about matching angles. Place the ruler across and mark it before grabbing the angle grinder to snip them off.
The Girl On A Bike Motorcycle DIY Harley Davidson forty eight sportster cam chop customisation cut corners2
The Girl On A Bike Motorcycle DIY Harley Davidson forty eight sportster cam chop customisation cut corners 1
Smoothing the edges
Angle grinders can be quite aggressive but we need a nice smooth rounded finish. Here we will use metal files. Firstly, use a coarse metal file, before downsizing to a finer finish. Gently file the cut edges smooth with one directional strokes.
The Girl On A Bike Motorcycle DIY Harley Davidson forty eight sportster cam chop customisation coarse metal file
The Girl On A Bike Motorcycle DIY Harley Davidson forty eight sportster cam chop customisation fine metal file
For the corner profiles use a fine file with a curved stroke to get a smooth radius with a sharp edge. The curved stroke with the file gives it a more natural finish.
Once finished you should have a rough flat surface with no grinder marks and less prominent filing marks.
Next we need to go even finer on the finish with wet and dry sandpaper. Make sure you keep it wet as you slowly smooth the finish. The goal is to have a perfect surface with no blemishes, no angle grinder marks and no filing lines.
The Girl On A Bike Motorcycle DIY Harley Davidson forty eight sportster cam chop customisation wet and dry sandpaper 1
The Girl On A Bike Motorcycle DIY Harley Davidson forty eight sportster cam chop customisation wet and dry sandpaper2
The Girl On A Bike Motorcycle DIY Harley Davidson forty eight sportster cam chop customisation wet and dry sandpaper3
This is a slow process but vital to get a professional finish. It took me roughly 30 minutes of filing and sanding.
Prep for spray painting
Following all the dirty work we need to make sure it’s spotless before we spray paint. Remove the masking tape, which was purely for protection. Then it’s into the kitchen sink, hot soapy water and a good clean down. You then need to fully degrease it with some brake cleaner.
Make sure you get rid of all the grime, finger prints and grease ready for spraying.
The Girl On A Bike Motorcycle DIY Harley Davidson forty eight sportster cam chop customisation clean to paint
The Girl On A Bike Motorcycle DIY Harley Davidson forty eight sportster cam chop customisation clean to paint brake cleaner
Spray painting
Purchase the correct paint to match your cam case / engine case, however you could of course change the colour of the case at this stage. I opted for official Harley-Davidson textured black – 98606BF Noir Texture via my local Harley-Davidson dealer. No doubt there is an after market version but I went straight to the source to get the good stuff.
Apply paint following the directions on the tin you purchased. I went for 4 coats covering both the new exposed edges and the rest of the casing to ensure no visible blending lines in the paint.
The Girl On A Bike Motorcycle DIY Harley Davidson forty eight sportster cam chop customisation spray paint noir texture black
The Girl On A Bike Motorcycle DIY Harley Davidson forty eight sportster cam chop customisation spray paint noir texture black3
Leave to dry or oven dry following paint manufacturer instructions
Remove paint over spray on seal surface
With the nature of spray painting you might have some over spray on the surface where the gasket will seal. Use a sharp razor blade, from a Stanley knife, to gently scrape off all the excess paint.
The Girl On A Bike Motorcycle DIY Harley Davidson forty eight sportster cam chop customisation spray remove overspray
The Girl On A Bike Motorcycle DIY Harley Davidson forty eight sportster cam chop customisation spray remove overspray2
Final clean and prep before re-assembly
Back in the kitchen for a hot soapy clean. Once dry apply multi-purpose grease to the new gasket and put gasket in place on the bike. The grease will help the gasket swell, which gives the seal required.
Re-attach the oil pipe union with thread-lock to make sure that stays in place. Screw it in finger tight in the correct vertical orientation.
Finally, prime the mating shaft surfaces with some engine oil.
The Girl On A Bike Motorcycle DIY Harley Davidson forty eight sportster cam chop customisation gasket grease
The Girl On A Bike Motorcycle DIY Harley Davidson forty eight sportster cam chop customisation oil pipe union
The Girl On A Bike Motorcycle DIY Harley Davidson forty eight sportster cam chop customisation oil prime
Refit cam case
Due to the high tolerance fit of the cam case, sliding this back on can be tricky. Work to align the mating surfaces by looking at the gap around the edge. Do not be tempted to use a hammer and bash it on. You must be patient and gentle. Once you’ve found the sweet spot you’ll be able to slide it on pretty effortlessly but it’s about finding that sweet spot.
Return the correct bolts to their original location utilising the cardboard cut-out created on removal. Using you bikes manual follow the diagram for the correct tightening sequence and torque values for fitting the cam case.
For the torque, the manual says 10.2-13.6 Nm. I went for 12, somewhere in the middle.
Here is the pattern and values from the Forty-Eight Sportster manual.
The Girl On A Bike Motorcycle DIY Harley Davidson forty eight sportster cam chop customisation gearcase screw torque sequence
The Girl On A Bike Motorcycle DIY Harley Davidson forty eight sportster cam chop customisation gearcase screw torque values
Reassemble the bike
Get the pipes and brake linkage back on. Note I have chosen to leave the front sprocket cover off to give a more rugged look. You can buy aftermarket guards if you’re worried about the exposure.
Cam case chop customisation complete!
Time Required
It’s a pretty swift job, I would anticipate around 4 hours plus drying time for the paint.
Ease of Completion
Hopefully I’ve shown how easy it is. It’s something completely achievable at home if you have the required tools. Get out there have a look at what shapes you like and try it out.
Crowd Reaction
Given how cheap this custom is it’s well worth the time doing it. Anyone can change the pipes, pegs or air intake but it takes a little more energy and precision to take an angle grinder to you ride. You might get the odd guy moaning that your sprocket is vulnerable but really…unless you’re riding through mud it’s not going to cause any issues. Winner on the streets I’d say!
£££
If you have the tools the only cost is going to be the paint and a new gasket, roughly £20-30. Very cheap given the finished look.
Highlights of a cam case customisation
Minimal cost for a great look you can do yourself
Adds a great raw rugged look to your ride
Easily achievable in a weekend
This will make you more aware of how your engine operates 😊
Ensure your cam case is firmly clamped before using the angle grinder
Thoroughly clean all dirt before painting and re-assembly
Apply nice thin even coats of paint to avoid drip lines
Make sure you to not compromise the gasket seal with your design.
Overall Rating
This simple home custom gives an epic, rugged and aggressive look. You can see the front rear sprocket and have a new slim profile. Simple custom for a great finish.
I CAN DO IT. YOU CAN DO IT.
Please remember to subscribe to my YouTube channel to star tuned for future videos.
Harley’s and Horse Riding in the Dominican Republic
Introduction
The trip to the Dominican Republic was a little random, my father-in-law retired and decided to take the family away on holiday to celebrate [pretty cool]! So given how my husband and I love making the most of opportunities we got on Google and hunted for fun things to do. We found Dominican Riders for Harley-Davidson tours and Cana Tequila for horse riding adventures [the KTM equivalent]. The perfect combination.
The girl on a bike dominican republic dominican riders harley davidson
The girl on a bike dominican republic cana tequila horse riding stallion Paso Higueyano
The girl on a bike dominican republic dominican riders harley davidson draggin jeans
Before the holiday, I booked the tours for myself and hubby so we knew we could definitely do them. This enabled us to bring the right riding protection with us. We always ride in Draggin Jeans and a Ruste Protection shirts, both fully Kevlar lined to keep us safe. We also brought HD boots and then borrowed helmets. Kit perfect for a V-Twin or a horse.
So many people think riding on holiday mitigates the risk of being on a bike, but it doesn’t. I always wear the protection as your kit has one moment to save your life or skin, and I know that only too well following my accident in 2014. For anyone spotting the riding shot in a tank top, this was a long straight road that I felt comfortable removing my Ruste Protection kevlar shirt to cool off a little. I didn’t ride the full day like that; I would have been too nervous about the fall implications.
The only other thing we had to organise was getting there from the hotel but that was easy, we simply hired a little car for each day and drove ourselves with Google maps. No dramas at all and much cheaper than any transfers or taxis.
Rental
Dominican Riders is where we hired the bikes. They have a fleet of black Harley-Davidson DYNA Street Bobs, all 2012 models, 1679 cc V-Twins. They were largely in great spec; I’d recommend you carefully check your ride over before you leave, making sure your breaks, bearings etc. are all up to spec for your safety (something I always do with a rental!).
The day tour included the bike hire, insurance, fuel, helmet hire and a scrummy lunch at a beachfront restaurant.
If you like the idea of Harley-Davidson’s in the sun, you definitely need to check out Cana Tequila for a day horse riding. They are an active cattle ranch who also specialise in breeding Paso Higueyano horses, with 45 horses and a huge plot of natural Dominican countryside. The location and ranch set up are absolutely stunning and ideal for seeing the Dominican Republic countryside from a different angle – off the road! The horses are all in fantastic condition, very well looked after, cared for and beautiful to ride.
The girl on a bike dominican republic logo dominican riders harley davidson punta cana e1510915971483
The girl on a bike dominican republic logo dominican riders harley davidson
The girl on a bike dominican republic logo dominican riders harley davidson street bob fleet e1510915998652
Roads
As a full day tour, we started at the Dominican Riders base, near Punta Cana, where we were greeted with big smiles, did a small amount of paperwork to make sure we’re all legal and shown our bikes. The say saw us exploring the northern part of the Dominican Republic on some incredible roads!
We travelled an array of roads, from small narrow lanes, fast open roads and hundreds of beautiful sweeping turns. Some of the most enjoyable roads I’ve experienced in my riding time. The road quality was fantastic, yes there were some mega potholes as you would expect. However, it was very easy to gauge the quality of the road and ride accordingly. Many of the roads were in perfect condition for some thrilling riding. The scenery ranged from a rural culture of remote villages, through tropical forests, spectacular views from the mountain tops and even beachfront sea views. Ultimately the tour took us through areas of the country we literally would never have seen; you’d never drive a car around there, it was a two-wheel adventure that enabled such a cultural view of the rural communities. We stopped at Coco Loco for a scrummy lunch of fried chicken on the Miches Beach on the Samaná Bay, where we also got to ride on the beach – now that was cool!. The afternoon saw more incredible terrain as we meandered back towards Punta Cana to finish off an incredible day riding. After a day in the saddle, I was sad it was over!
We covered 150 miles of breathtaking scenery, sweeping roads, rural communities we’d just never get to see otherwise. We probably also passed 150-speed bumps – the Dominican Republic literally loves them, every village had 2-4 of them on the way in and out to make sure people slow down – and trust me there’s not going fast over them as they’re huge. Nothing to worry about but you’ll know what I mean if you’ve been!
The girl on a bike dominican republic dominican riders harley davidson beach 4
The girl on a bike dominican riders.com route harley davidson
The girl on a bike dominican republic dominican riders harley davidson 2
The girl on a bike dominican republic dominican riders harley davidson cattle e1510916441282
Scenery
I couldn’t recommend this horse riding experience with Cana Tequila more highly.
There are a lot of places to horse ride in the Dominican Republic, but this place wins the prize for its incredible access to hundreds of acres of wilderness, open fields, rocky trails, stream crossings, and green, green pastures with cattle happily roaming. The views were incredible.
On returning from the ride, we were given a yummy lunch of chicken, pork and vegetables and of course greeted by tequila shots; great atmosphere, beautiful, clean set up and wonderful horses.
No matter your riding experience the Cana Tequila will look after you well.
The girl on a bike dominican republic cana tequila horse riding 1
The girl on a bike dominican republic cana tequila logo horse riding
The girl on a bike dominican republic cana tequila horse riding 2
Accommodation
We stayed at Dreams La Romana on the southern side of Dominican Republic. It was a beautiful hotel with all-inclusive facilities. It’s amazing how many Pina Coladas you can enjoy in a week when they’re on tap! We enjoyed the a la carte dining, beachfront locations and free access to Hobie cats, SUPs and kayaks.
Coffee
I have to say that the local Santa Domingo coffee is incredible. We thoroughly enjoyed a filter brew in our hotel room every morning before topping up at breakfast and the beach-side bar.
The girl on a bike dominican republic santa domingo coffee
The girl on a bike dominican republic santa domingo coffee e1510824789601
Highlights
It has to be the landscape. Everything is so green and vibrant. Everywhere you ride, whether on horse or Harley-Davidson, you see the stunning scenery from tropical forests, rolling pastures full off happy cattle, aches of sugar cane and coffee, brooks and streams trickling past and just so much green! It’s a lush country with such variety, hills, fields, forests and white sand beaches.
Also, a big highlight of the Harley-Davidson tour was the ability to ride down the beach. How many places in the world let you ride a Harley-Davidson down the beach? That was awesome!
Tips From Experience
If you enjoy sweeping turns and fast straights you need to ride here
It’s definitely a place to explore on a V-Twin. You’ll out man all the bikes you pass
On horse and Harley, you’ll also get to see areas of the island culture that you just wouldn’t pass otherwise
Keep eyes like a hawk for dogs, kids, horses and even herds of cattle on the road
But on the horse, keep your eyes open for huge frogs, snakes, wild fruit and beautiful birds
It’s hot, but it’s definitely not too hot for Kevlar protection – stay safe and don’t turn up in shorts for either activity.
Remember to smile all the way but keep your mouth closed unless you like eating bugs
Overall Rating
I most definitely would recommend the Dominican Republic. I was only there for one week but managed to cram in Harley-Davidson’s, horse riding, tourist visits in Santa Domingo, scuba diving including a wreck with Scuba Fun, as island party on Isla Soana and still had time for chilling on the white sand beach enjoying Pina Coladas and bubbly at sunset. The locals are lovely too. I destination worth putting on the bucket list!
Get yourself to the Dominican Republic for a bike and horse adventure! It’s an epic way to combine sun, sea and Harley-Davidson’s
The girl on a bike dominican republic dominican riders harley davidson beach 2
The girl on a bike dominican republic scuba fun pirate Isla Soana
The girl on a bike dominican republic scuba funIsla Soana
The girl on a bike dominican republic scuba fun quadbike
How does one wake up and go, “oh I know I fancy a fairing.” The reality is, for me, that’s not how it happened. The first Harley Davidson I ever rode was a Heritage Softail. For those that don’t know this model, it’s a large cruiser with insanely comfortable smooth suspension, and the version I rode had a mini windshield. Over 5 days I did 1000 miles with total comfort; I could literally ride for 8 hours and feel fresh getting off.
Fast forward to 2015 when I got my Street Bob and a weekend adventure up to Darlington for the Jungle Memorial Ride where I did over 750miles in two days. I was toasted by the end of it, and I realised that the wind fatigue was playing a huge part in it. So I decided to do some research on a screen of some kind but knowing that I am not personally a fan of windshields. Then Memphis Shadeswww.memphisshades.com entered my world, and I discovered their Café fairing. The ideal compromise between style and function.
The Girl On A Bike Harely Davidson StreetBobo DYNA VANESSA 65
The girl on a bike memphis shades logo comparison harley davidson
The Girl On A Bike Harely Davidson StreetBobo DYNA VANESSA 60
I’m certain it does not add to the performance of my machine.
But, it almost certainly improves my personal physical performance in allowing me to last longer on the bike, by reducing the wind buffer. The fairing, while small, does an impressive amount in deflecting the wind off my chest, redirecting it up over my head. The one-piece construction machined design shape is perfectly tuned to cut through the air flow and provide an appreciated respite from the wind. And the faster you go, the more you appreciated it.
I have noticed that on really windy days, which suck on any bike, it can require slightly more riding compensation to adjust to the wind. Especially if it’s a crosswind as the wind can whip into the back of the fairing, and impact the bars, but just keep in mind that there is nothing to worry about.
This fairing is approximately 7″ from the top of the headlight bezel to the top of the fairing; it may seem small but big enough to make a difference.
For anyone interested in the safety side, Memphis Shades windshields and fairings are “DOT (Department of Transport) approved and conformed to American Nation Standards Institute (ANSI) Z26.1 – 1996, Group 6, Safety Glazing Material for use in Windscreens for Motorcycles”…how that translates to other markets…I’ve not a clue! Sorry.
Ultimately, if you want full protection from the wind there are better options than this little number, however, if you’re looking for something to make a difference to the wind while keeping your styling [i.e. not going full windshield], then this is a good purchase.
Look & Styling
One thing I love about this fairing is the extra road presence it gives to your bike. The fairing is beautifully made of a one-piece aircraft-grade Lucite acrylic construction. It’s seamless with a machined ‘witness line’ outlines windshield, purely for design which I love.
The fairing comes in a factory finish black, great as it is but the surface is also ready to paint to ensure you can easily custom to your ride if desired. As my bike is wrapped in the 3M vinyl wrap, I simply wrapped it to match [check out my pros & cons to wrapping / and how to wrap articles]. It looks the part! Worth noting is that the inside is a nice black finish, so it blends into the back of the headlight.
The Girl On A Bike Harely Davidson StreetBobo DYNA VANESSA 65
The Girl On A Bike Harely Davidson StreetBobo DYNA VANESSA 20
The Girl On A Bike Harely Davidson StreetBobo DYNA VANESSA 24
Build Quality
The fairing and kit, which includes relocations for the front turn signals, looks and feels great. The build is solid and firm, instilling trust, while also being super light-weight so as to not suck up to much pony power from your performance. The engineering design behind the quick release mounting points can’t be faulted, they’re simplistic in their design, functional in their use and mean switching to and from the café look literally takes seconds. Two clips and it’s off.
Their decision to use Lucite is down to its earned reputation as a high-quality material. It’s ultimately a trademarked version of acrylic resin developed by DuPont in 1937. And the key here is that this type of acrylic plastic can be used as replacements for glass while also supporting constructive qualities. Ideal for a fairing with glass and solids! But, don’t be fooled by some cheap options on the market made from acrylic as not all acrylic is equal! Lucite is a widely agreed higher grade acrylic plastic – good choice by Memphis Shades.
Ease of Installation
Super easy. It comes with clear instructions and a full installation kit. If you can use a spanner, you’ll find it a doddle. One slight complication is the need to relocate the front turn signals [if you have standard ones], but as it comes with the kit to do this, it’s all part of the ease.
The fairing is custom fit for your model, so it’s literally ready to go and comes with the Memphis Shades exclusive trigger lock mounting system allowing it to be taken on and off without tools.
An extra point here is that once you have a Memphis Shades trigger locking kit installed you can switch between the café fairing, fat/slim windshields, sport-shields or batwing fairing without the need for tools or different mounts. Totally interchangeable! I’ve only got the one, but I would definitely consider a larger shield if I was planning a week-long road trip.
One thinks to possibly check before ordering is the compatibility with any custom front headlines, I run a standard light, but I don’t know how it works with others. Most likely fine – better to check and be sure.
The girl on a bike cafe fairing memphis shades trigger locking
The girl on a bike cafe fairing memphis shades trigger locking
Crowd Reaction
Ok, so being totally honest I was a little unsure how it would be received. The nature of a fairing means it’s like Marmite[marmite explanation here]. People either love them or hate them. Well, that is what I thought; it turns out this cheeky little number is a converter. I’ve had a lot of people comment about how surprisingly good it looks, how it gives it road presence = surprisingly good meaning ‘I hate fairings, but I actually like this look.’ Yes, you still get the haters, but ultimately it’s my bike, I love it, and I reap the benefits of reduced wind fatigue. So haters can be haters. I’m a lover, and there are a lot of fellow lovers out there.
See for yourself – with and without:
The girl on a bike memphis shades comparison with fairing
The girl on a bike memphis shades comparison no fairing
£££
From my understanding, these sit at the mid to high price range. You’re getting a versatile, high-quality product that will last for years. You’ll also get a 24-month warranty and a great team at Memphis Shades on hand to support your every need.
Highlights
Functionality merged with style
Lightweight
Removable in seconds with interchangeable range
Tips from Experience
Test and adjust the café fairing position for your body position to ensure the buffer goes over your head and not into it
Keep alert on windy days as the fairing can catch the wind
Overall Rating
Ideal accessory for combining functionality, flexibility to remove and Californian café styling to your ride.
If you’re new to my page – it’s more than just dirt bike riding, Harley’s and racing, I’m on a mission to prove that nothing is impossible if you want it bad enough. See more about my story plus read about my life changing accident, which started it all.