My pause for thought stems from a simple hello. I remember as a child growing up, we lived on a cul de sac, we knew all the neighbours, parents chatted, kids roamed from garden to garden. All happily bonding as a community. You’d walk to the local shop and say hello to people simply because you both lived there, not necessarily because you knew them. Fast forward 25 years, yes, I’m giving my age away, but the world feels really different. People busy going about their own business, no time to stop or even pause to smile. Head down, often with headphones or eyes glued to screens. An aerial video would probably look like the organised chaos of ants, all going about their own business, seamlessly passing and ignoring each other. But then something happened…
The power of smiles
Lock-down hit and the world was turned to four walls at home. Human contact was removed from our every day lives. Yes, video calling boomed but that animal instinct need for physical interactions was not taken away. I noticed something magical though, at least in Oxfordshire, when social distancing for walks in the park and essential trips started to pick up, interactions seemed to change. A once almost awkward hello from an over friendly stranger has now become something of the norm. I go out for a walk now and everyone seems to smile, people even use their voices and say hello. Hello to total strangers. It’s almost the total opposite, before the odd person who said hi was strange, now it’s the odd person who doesn’t say hi that comes across as strange! We’re all waving, nodding, smiling and actually acknowledging each other. It’s almost like the lack of connection has awoken a whole new appreciation for human interactions, even if it is with a stranger. It is lovely.
I like to think of it as the smile ripple. Just like a drop in the pod rippling across the surface of the water, so too can our smiles spread. My mum would tell me a smile costs nothing but can bring so much joy, so much so it can totally uplift a person’s day. And, smiling at one person, will most likely lead to them feeling a little warm glow, which leads to another smile, and another. And before you know it one smile has brightened up the lives of a whole handful of people, just from a friendly hello.
As life returns to a new form of normal, I hope this new energy for politeness and positive human interaction will continue. Let us all smile at the next person we see.
Thank you for reading my pause for thought as heard on BBC Radio Oxford
If you’re new to my page – it’s more than just dirt bike riding, Harley’s and racing, I’m on a mission to prove that nothing is impossible if you want it bad enough. See more about my story plus read about my life changing accident, which started it all.
Is the Praep ProPilot core balance trainer a gimmick?
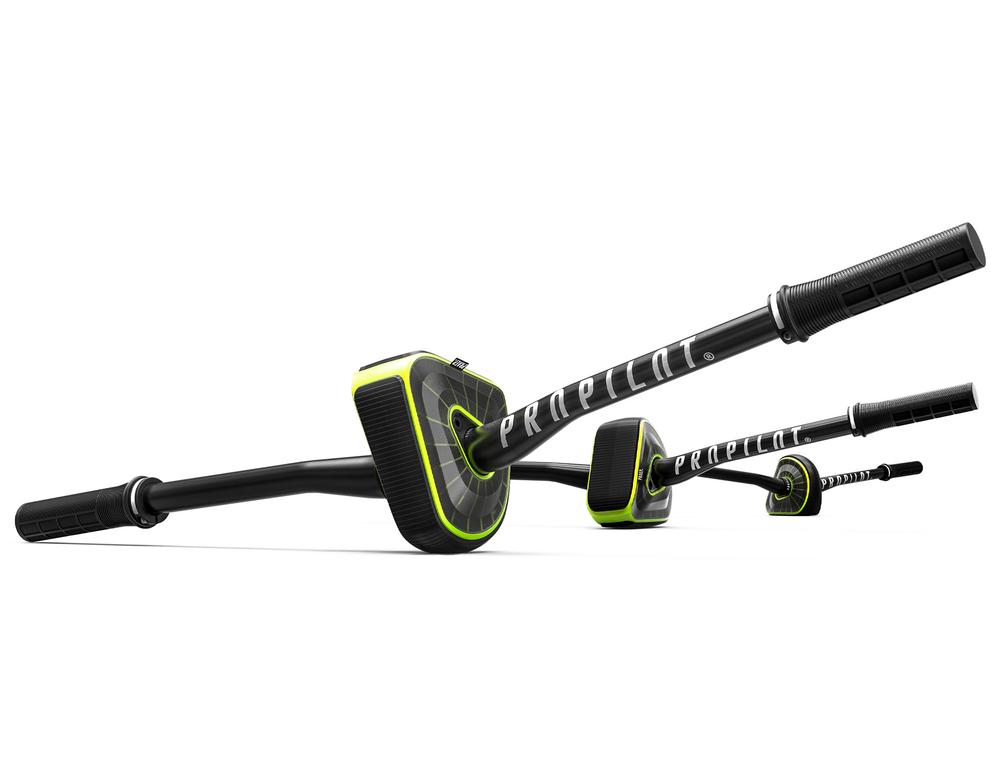
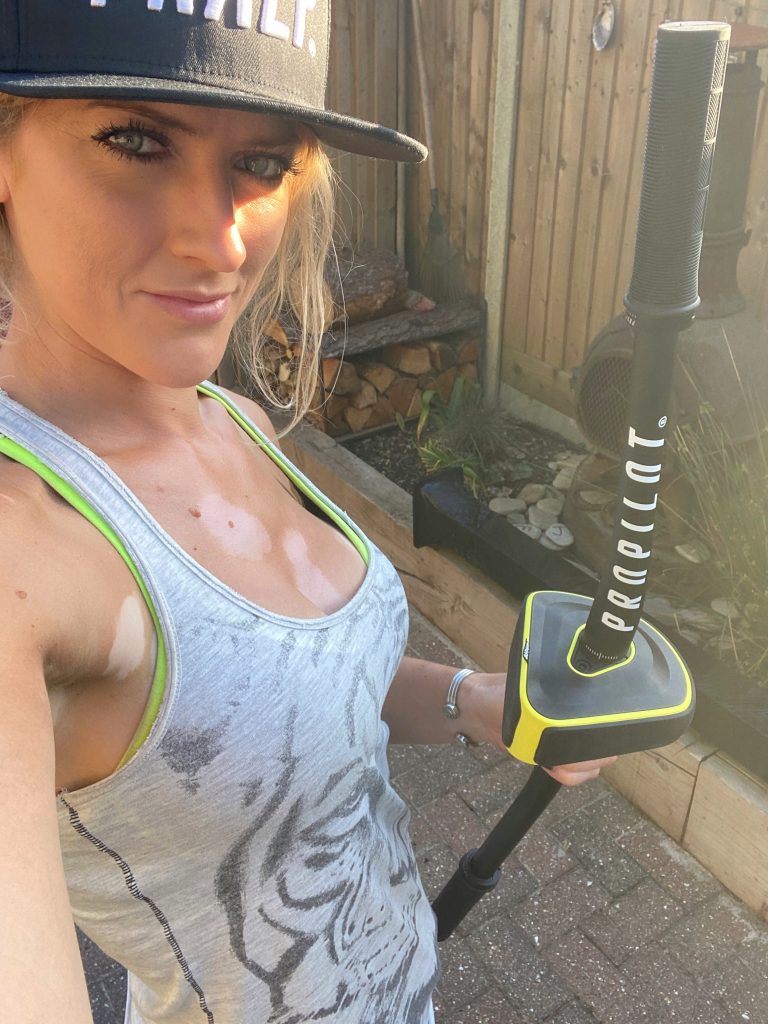
No definitely not and here’s why! This magic kit gives fun, motivation and unbelievable fitness at home. I thought it might be a gimmick, but it’s actually nails and really enjoyable. The Praep ProPilot has been designed to keep you motivated with this fun app, setting training goals and tracking your progress. But the key is its connection with moto and bike fitness. Life often means we can’t ride quite as much as we wish but with the ProPilot we can get some serious bike endurance going from our living rooms. The set-up mimics that faced on the bike, homing in on the core muscle groups and giving you a serious pump without being on the bike.
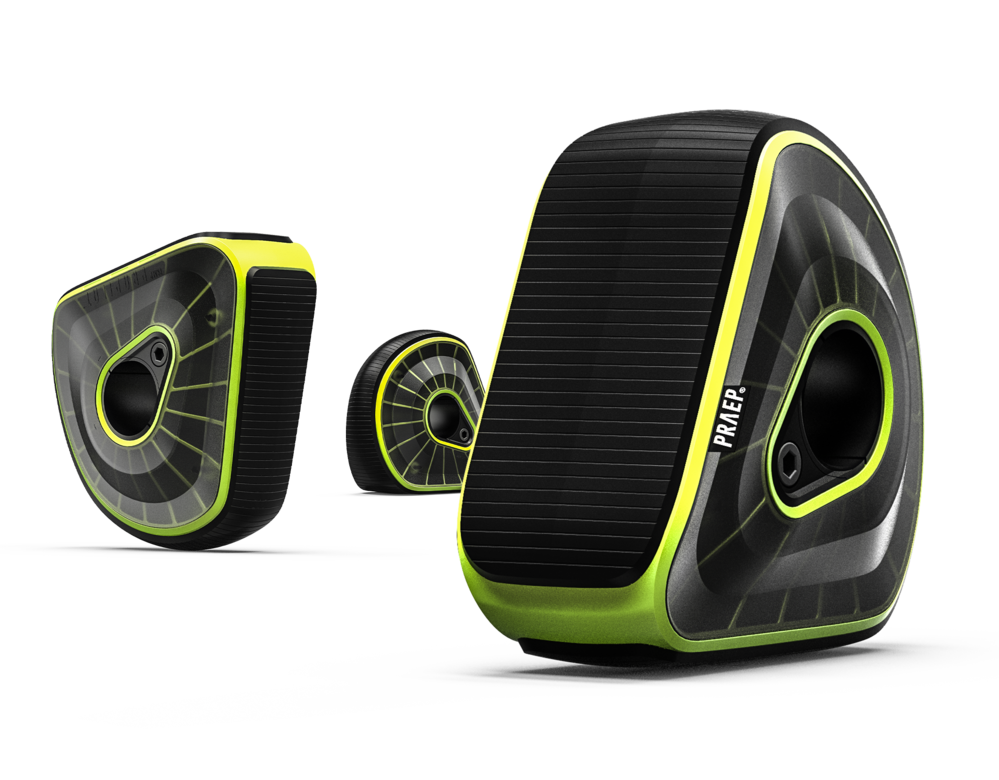
In short, it’s a bike handlebar balancing device, but in reality, it is so much more. The handlebar is mounted on a central unit with three difficulty settings, each giving more or less stability and wobble. The harder the setting the tougher the workout. Designed by bikers the ProPilot is designed specifically to support off the bike, bike fitness. There is a free app to use in conjunction which provides a selection of workouts, exercises, challenges and games! Yes games. My favourite is Game of B.I.K.E.
ProPilot trainer
What is Game of B.I.K.E.?
This is a plank balancing game. You hold a blank, balancing on the Praep ProPilot so it’s far more than just a normal plank and then using the app you have to ride the bike down either a dirt track or street. The game plays a rolling display as you ride and random obstacles appear forcing you to weave and manoeuvre past them. You do this by leaning on the bars, adding to the strength and core stability required.
I challenge you to your best score in a Game of B.I.K.E!
Will the Praep ProPilot get boring?
With all thing there’s the risk of things getting old but I genuinely can’t see this happening.
There are loads of variation workouts in the app and the key for me is that it makes doing stuff that’s amazing for the body fun. Simple things like holding a balance blank…boring…but when you’re riding a downhill track it’s suddenly fun!
It also tracks your progress and gives you challenges, all bait to getting that workout done when the motivation might be lacking. But I really think the key for me is the enjoyment and the feeling of being on a bike. Ok, it’s not like actually riding a bike but you really can feel the similarities and thus know it is going to help your riding fitness.
What’s next for Praep?
Praep is a relatively new company too so given the app offering already I can almost guarantee there are going to be some epic updates coming soon. More content, more games, more challenges and an even more intelligent interface. I’m excited for what is to come and getting in early is always a good thing.
Can you use your own handlebars?
Absolutely! Praep offer a few variations:
ProPilot – this is just the central unit and you can attach this to any moto / bike handlebars. This is a big saving if you have an old handlebar sat around
ProPilot Moto Kit – this is the full handlebar set up with moto style grips
ProPilot Home Kit – here you get all the extras for the ultimate home workout. Such as skid plates for your feet and work out bands to add new moves to the workouts. This is what I have.
Gym-Edition comes with a handlebar that gives you numerous grip positions to train certain muscle groups even more intensely.
The App is completely free and there is no subscription cost.
Praep ProPilot kit options
What is the difference between doing normal push-ups and Praep ProPilot push-ups?
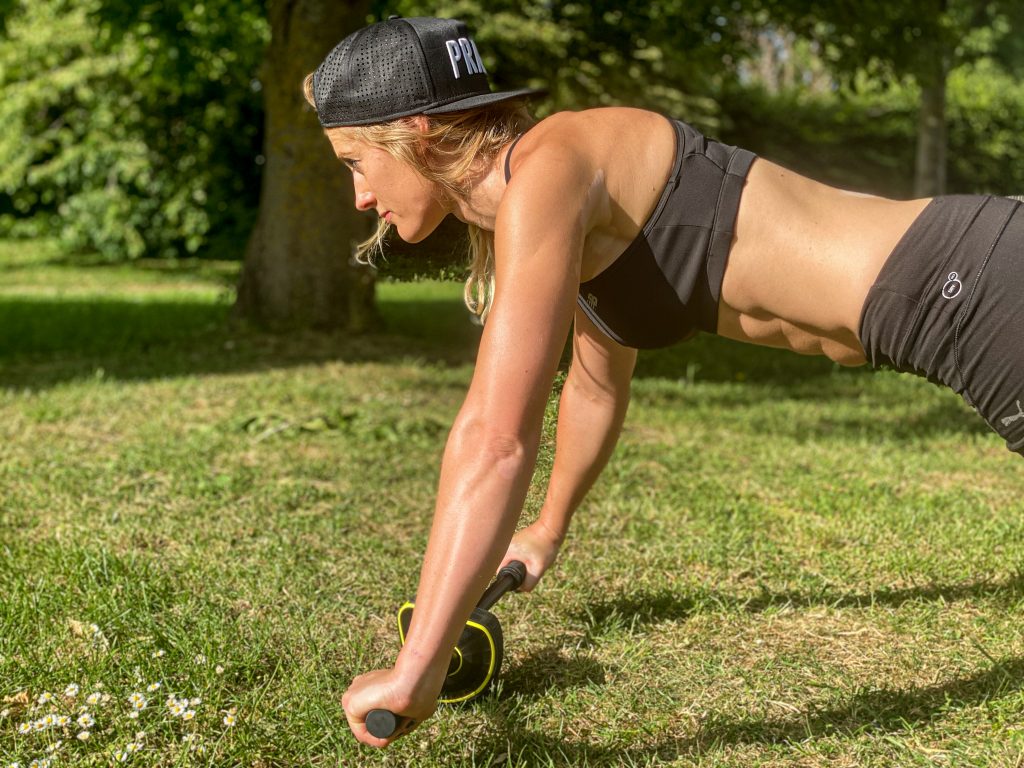
With the need to balance and hold the core the push up is considerably more intense and using more of the body’s strength and muscle groups. So the main difference is the instability and the muscles it triggers: the deep muscles. These are not the classic bulking muscle pumped in the gym or with regular push-ups. It’s the muscles that ensure stability, strength, and endurance. The core.
Generally, we all have two different kinds of muscle fibres. The ones that burn sugar and get sore when engaged too hard and too long, and the ones that are close to your joints that burn oxygen and have a better long-term performance. They are called deep muscles and this is what we are triggering. The ProPilot isn’t going to bulk you up, it’s going to give you some serious core strength and toning!
Praep push-ups adding a huge core workout
Can you do more than just planks and push-ups?
Absolutely! Praep have been creative working with pro athletes and real riders to work out lots of ways to use the ProPilot. It’s not just planks and push-ups. Add a band for arms or use skip plates on the feet to give an even more intense all body workout. Keep any eye on the Praep YouTube for inspiration.
Band workout
with ProPilot
How does the Praep ProPilot connect with the app and phones?
Praep have a free app, simply download, sign up and go! With modern iPhones having various motion detections and sensors the app utilises these. You sit the device on the ProPilot [it comes with a small magnet to ensure it doesn’t slide off but it’s not vital] and the iphone sensors feed the app with what’s happening. It can feel the balance point knowing when you’re learning, when your face is near for a push-up count and takes in this information.
You can watch downhill YouTube videos, where you can enjoy virtual trail riding in the plank position and weave around obstacles. Something you need to try out. It makes the whole training more gamified, distracting the mind as the muscles start to burn.
Why is the ProPilot not counting my push ups?
This is something I noticed at first but it’s down to technique. For the pump push ups the ProPilot app uses the proximity sensor of your phone. This is the same features used by the phone to know when the device is next to your ear for a call, and thus turning the screen off. It ensures that the display is switched off as soon as you have the phone on your ear. However, this also means that it only triggers when you are really close to the display (1-3 cm). You can easily test this with your palm by holding it very close to the front camera. Here, however, the sensors of the various telephones react differently. In addition, the mode is programmed so that it ends the session after 5 seconds without contact. So put your chest / face down to the display and don’t pause too long.
You need to do reps in less than 5 seconds and go all the way down or it will time out or not count.
Overall Rating
The ProPilot turns monotonous workouts into fun and efficient training sessions, improving your coordination and stamina on the bike. I’m full on addicted, playing daily and seeing some serious strength gains in a short period of time.
Get one ordered and start the fun!
For 15% off Praep ProPilot use “VR15”
*I do make a small commission if you buy so thank you in advance for the support and I hope you enjoy the Praep burn too.
Keep reading to find out why I highly rate the CTEK CT5 POWERSPORT and would never have a vehicle without one.
CTEK CT5
Setting the scene
It’s a beautiful day, the sun is shining and you’re off for a ride. What is the most disappointing thing that could happen? Finding you have a flat battery!
Introducing the CTEK CT5 POWERSPORT providing fully automatic charging for a range of vehicles.
With lock-down, winter, injury or just life taking over seeing many motorcycles and cars parked up for prolonged periods of time keeping their battery health up is important for a few reasons:
ensuring the vehicle will start when you decide to use it
keeping the battery health up and charged to capacity
helping ensure longevity of the battery
guaranteeing your battery is ready to go when you are
Unfortunately, if left unused a battery will lose charge and when a battery loses is full charge it dramatically reduces the long-term life of the unit. The CTEK devices are designed to live on your battery when not in use. They are perfectly engineered to provide the perfect level of current to keep the battery life in the ready and happy range. It’s actually possible to keep a battery running for many years longer when properly maintained with a CTEK too. That is a big saving.
The CT5 POWERSPORT has been designed specifically to charge and maintain powersport batteries using advanced technology to give you three fully automatic charging and maintenance programs:
Normal
AGM
Recond
Why CTEK?
They are the leaders in the market and they’ve got years of R&D to ensure the optimum performance int heir produces. The most important property of a battery charger is that it reaches the exact voltage during the charging cycle. Ge this wrong and your battery is in trouble. If the voltage is too high, the battery boils. The battery then becomes unusable due to dried-out cells and crevice corrosion, which occur when there’s high acid concentration and overheating during charging. If the voltage is too low, you end up with an incompletely charged battery that will lose more and more capacity until it gradually becomes unusable.
CTEK have designed a range of products fit for purpose. Many times a vehicle is going to be parked outside when needing charging, leaving you at risk with the elements and electrical products. However, CTEK know battery chargers are often used in damp and dusty environments, such as:
Outdoors
In garages
On caravans and campers
Around harbours and on boats
All CTEK battery chargers are approved for outdoor use (IP65 and IP44). If you’re using a cheaper rival and you’re using a battery charger outdoors, you must use a charger that’s approved for outdoor use or you could run into trouble.
Why battery charging should be on your maintenance list
As vehicle technology continues to develop, more and more strain is placed on the battery. As a result, battery charging has become an essential part of bike and car maintenance which should be considered as important as checking tyre pressures and oil levels.
There are various types of battery charger currently available – mostly smart chargers and trickle chargers. However, smart chargers present a much safer and efficient way of maintaining and prolonging the life of the battery.
How a trickle charger works and why you don’t want one
With a trickle charger once a battery has reached its optimum charge levels, a trickle charger will simply send in a level of charge for a certain amount of time and then switch itself off. It will continually repeating the process until it is removed from the battery. This method of battery charging can potentially overcharge the battery, causing it to dry out or even start to gas, and could ultimately kill the battery.
This is why I recommend a smart charger.
How a CTEK smart charger works
CTEK’s smart chargers move into a pulse maintenance mode once the battery is fully charged. Rather than sending in a charge and estimating what the battery needs, a CTEK charger will stay in constant communication with the battery, reacting and charging only when it is needed.
In pulse maintenance mode, the battery will be allowed to naturally self discharge to a certain level before being fully charged once again. Not only does this avoid the risk of overcharging but, as the battery is being exercised as it would be during normal use, the lifespan of the battery is extended considerably.
BATTERY FAILURE
Battery failure
If you look at the statistics, battery failure is often considered the number one cause for breakdowns around the world. This is both a big cost for possible call outs to get you home but also in the cost of new and replacement batteries due to failure from lack of maintenance.
Our modern vehicles have pretty complex and sensitive electrical equipment that constantly draws current from the battery, which means there is an ever-increasing number of mechanical faults that are battery related. The good news is that the expense and inconvenience of battery failure could be heavily reduced by regular battery maintenance.
CTEK’s unique range of smart chargers optimise the performance of lead-acid batteries through accurate readings of a battery’s charge levels, then ensuring the appropriate action is taken so the battery is always ready for use.
CTEK chargers extend the battery’s life and eliminates the problem of battery failure. More importantly, it makes sure that vehicles start first time, every time and the problem of battery failure is eliminated.
How CTEK chargers connect
Our chargers are easy to connect, spark proof and reverse polarity protected, so you can use them unsupervised and there’s no need to even disconnect it from the battery – simply ‘plug and play’ and the charger will do the rest.
CTEK connections
What vehicles can CTEK work on?
CTEK designs and manufactures a range of smart battery chargers and accessories to suit all types of lead-acid batteries for vehicles including cars, bikes / motorcycles, marine vessels, agricultural vehicles and even lawnmowers.
Types of vehicles
What do these mean?
Normal – this is for living on your battery and maintains the correct charge to be ready for action. The units come with small battery connections that can be fitted and left discreetly on the bike. You can then clip the CTEK on and off in seconds giving you no excuses to not pop it on when you park up.
Recond – if your battery has run flat or is losing charge rapidly, the CTEK CT5 POWERSPORT can be put on an intelligent mode than will effectively recondition your battery. It’s not guaranteed to bring it back to live but I’ve many, many a battery living on after a CTEK recond.
What is the CTEK CT5 Powersport
The CT5 is a smart charger to optimise the performance of lead-acid batteries through accurate readings of a battery’s charge levels, then ensuring the appropriate action is taken so the battery is always ready for use. It effectively charges and maintains your battery when not in use.
Ease of use
Attached using two battery connections you simply install these once and you’re then good to go. You can leave it on for endless amounts of time. I’ve left my Harley for 10 months before and she started first turn over having had the CTEK CT5 POWERSPORT on to keep the battery maintained and ready for action.
The Techy Bits – CTEK CT5 Powersport (40-138) General Information
Comfort Connect compatible: Yes.
Rated voltage: 220-240v AC 50-60Hz.
Charging current: 2.3 amps.
Current, mains: 0.5 amps RMS (at full charge current).
Back current drain: <1.5 Ah/month.
Ambient temperature: -20 deg.C to +50 deg.C. Output power is reduced automatically at high temperature.
Battery types: All types of 12v lead acid batteries (wet, MF, GEL, Ca/Ca and AGM).
Battery capacity: 5-25Ah
Dimensions: 292 x 132 x 102 mm
Insulation class: IP65.
In the EU, all battery chargers must be CE marked. Third party testing and approval of equipment is required for your safety.
Limitations
Honestly, as someone who has owned a CTEK charger for over 12 years with the original unit still working, I have not found a single limitation. Having correctly maintained batteries with a CTEK unit installed on each vehicle, I would never be without them.
Maybe the limitation is on the human. If you forget to connect your CTEK you’re going to regret it….
Photo by Victoria Bowers
£££
You’re looking at £60-75 for a unit that comes with a warranty and is likely to last 10 plus years. You’ll have a ready for action bike or car and the piece of mind that you’re properly maintaining them. Avoiding the disappointment of a ‘sputter, sputter, sputter’ is worth every penny. Also, by monitoring your battery condition, you can prevent a deep discharge occurring, which will result in loss of performance and early replacement.
Works on all 12V batteries (lead acid) and newer models also to lithium batteries
Ensures your battery is ready to go when you are
Increased battery life to save you money
Tips From Experience
The sooner you get one the sooner you’ll keep your battery health up
Get in the habit of having it permanently connected when parked up, it’s designed to be so it won’t over or under charge.
It’s kind of magic how a totally dead battery that you thought was only destined for scrap can be fully reconditioned and live on reliably after a CT5 revamp – saves you money on battery’s.
Overall Rating
Small but highly powerful and practical device giving you the confidence that you’re ride will be ready to go when you are. Looks after your battery for the longest life possible to give the most reliable performance so that nothing can come between you and that adventure. Must have for anyone with a vehicle with a battery!
If you’re new to my page – it’s more than just dirt bike riding and racing, I’m on a mission to prove that nothing is impossible if you want it bad enough. See more about my story plus read about my life changing accident, which started it all.
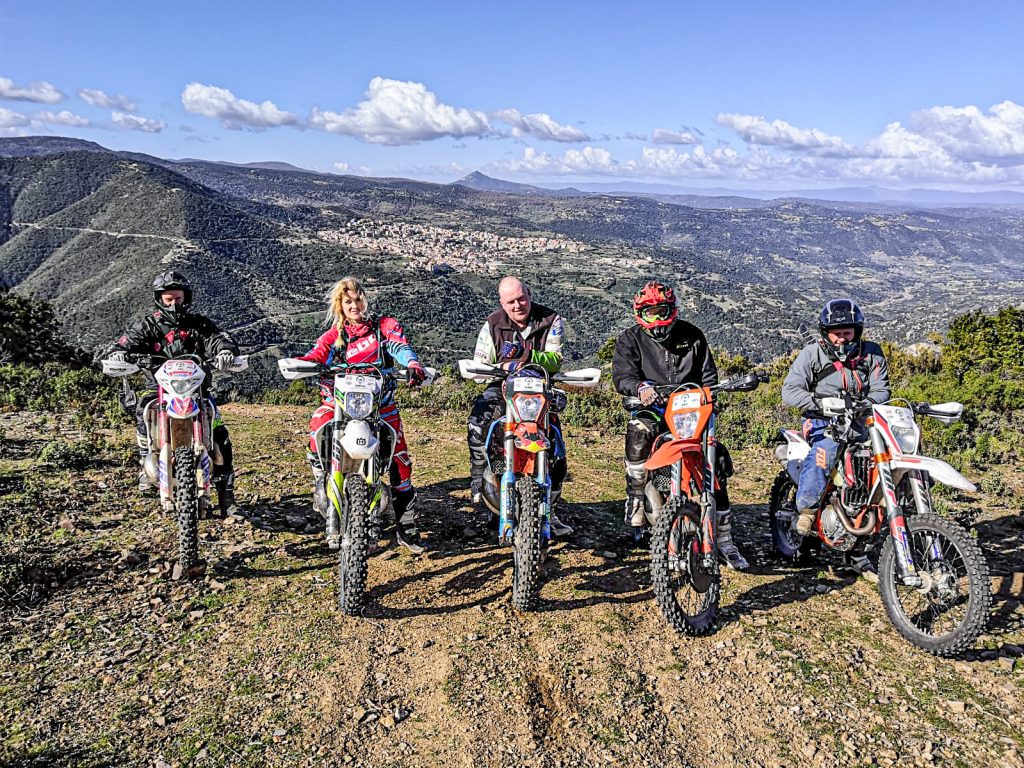
Sardinia is definitely a hidden gem in Europe for enduro and hard enduro riding and Tour Enduro Sardegna have it nailed!
The varied landscape and ability to ride so much terrain unhinged really exceeded my expectations. Tour Enduro Sardinia have an incredible knowledge of the local terrain, navigating seamlessly and knowing a huge mix of trails. Terrain included highly technical rocks, mountain passes, rocky riverbeds, valley bottoms, highlands, forest trails and all largely single track, plus some big fast sweeping fire tracks. Everything from steps, hill climbs, descents. waterfalls and mud to keep you on your toes. One day even enabled a mega loop to the coast for lunch.
The accommodation was a beautiful ‘farmhouse’ villa block with onsite breakfast and dinner. I had a lovely comfortable big room and nice bathroom, set with views of the mountains. It was gorgeous. Lunch was in local restaurants, where I thoroughly enjoyed the local Sardinian cuisine.
Marco, the man behind Tours Enduro Sarginia is an absolutely fantastic rider! Akin to a mountain goat, so the ideal guy to show you around.
Tour Enduro Sardegna riding
I choose to rent a Husqvarna TE300i from Marco and it was fantastic. The perfect weapon and in great well-kept condition. You can also bring your own bikes if preferred.
Marco doesn’t have kit to hire but I always take my own so that was not a problem.
Would I go back to Sardinia? 100% I think it’s officially my favourite hard enduro riding location in Europe now. It has such a mix of terrain, the skill development and training is superb.
Tour Enduro Sardegna is a massive thumbs up from me!
Here are some of my favourite photos from my trip with Tour Enduro Sardegna:
Amazing memories from Sardinia
Here’s some video from my Tour Enduro Sardegna trip:
If you’re new to my page – it’s more than just dirt bike riding and racing, I’m on a mission to prove that nothing is impossible if you want it bad enough. See more about my story plus read about my life changing accident, which started it all.
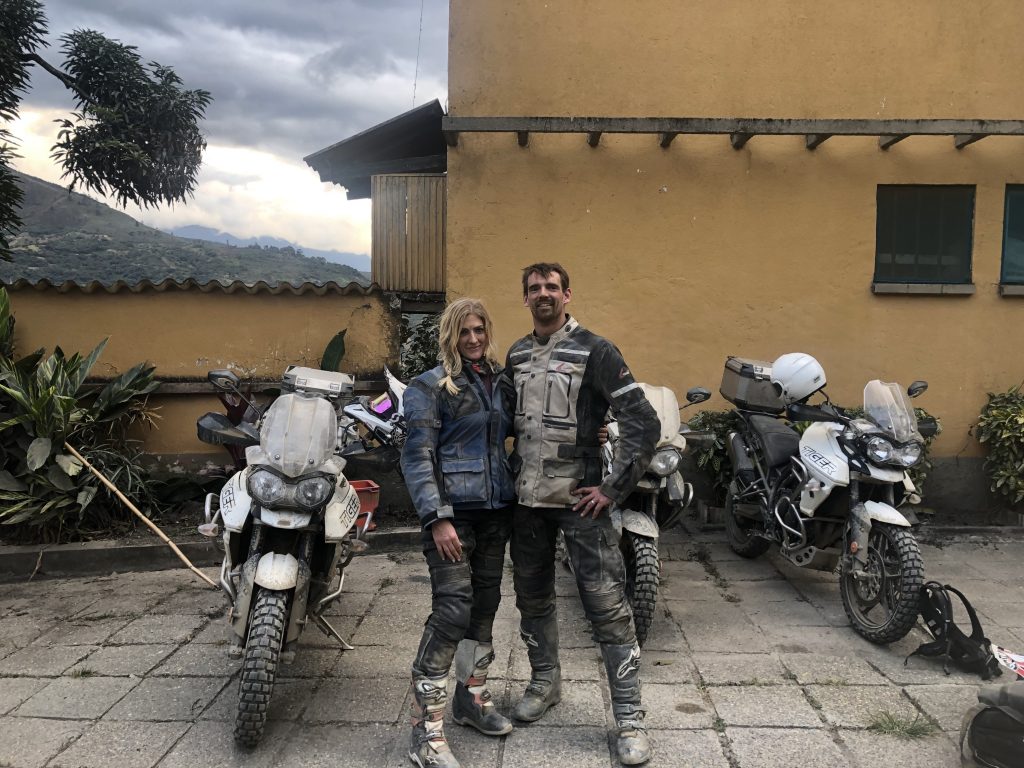
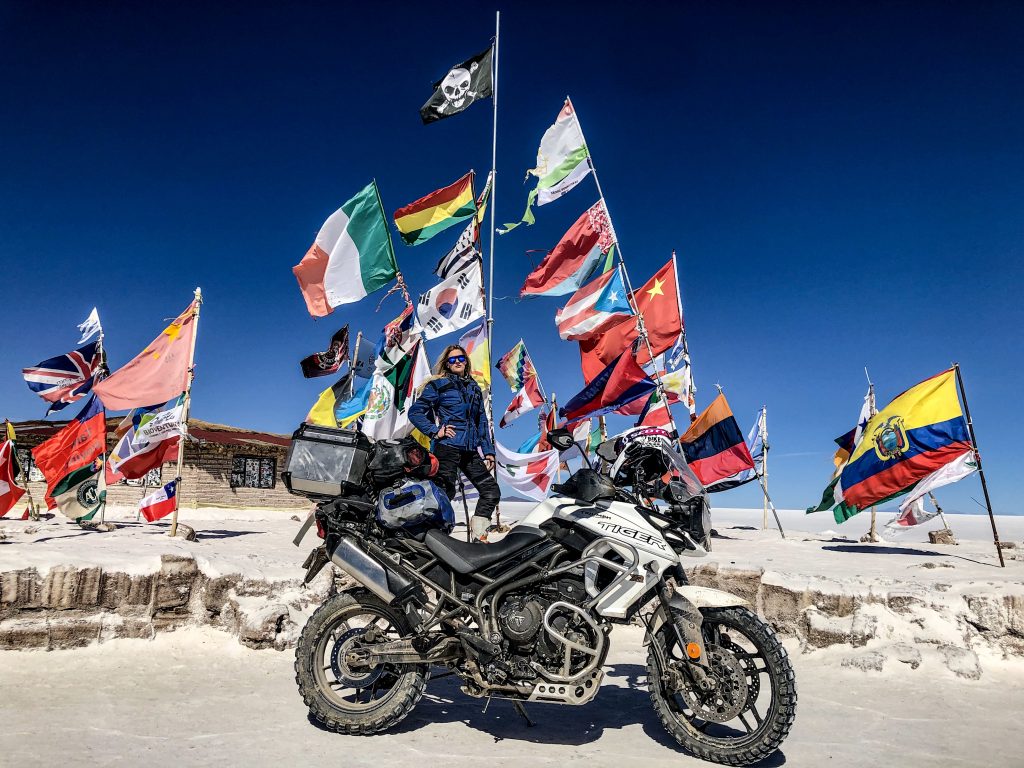
My husband and I embarked on a mega road trip with Novo Adventures, starting from Santa Cruz Bolivia and it was filled with breathtaking moments from start to finish.
We began the trip with a tour of Novo Communities, the charity organisation where Novo profits are funnelled to support addiction rehabilitation in the Bolivian communities. This was heart touching and grounding. Knowing that our ‘fun’ and ‘adventure’ riding motorcycles in Bolivia was helping to dramatically change lives was a lovely feeling. It’s something so easy to read but when you see it first-hand it’s quite a grounding moment of appreciation for what the Novo team are doing.
Novo Communities visit with Novo Adventures
From start to finish Novo demonstrated an incredibly high level of understanding on how to make the most memorable and epic trip imaginable. This was everything from where the best roads are, what to look out for, finding the best places to stay, how to manage fuel stops in rural towns where fuel is not readily available, to simply making sure we had the best time.
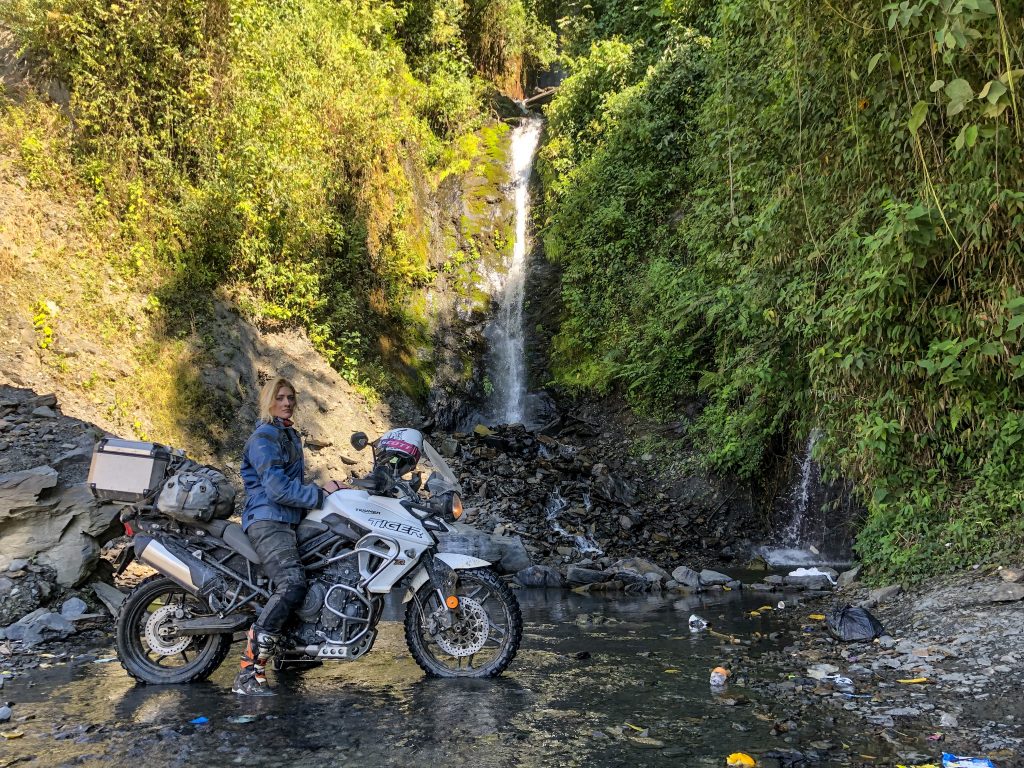
Tiger 800 adv holiday
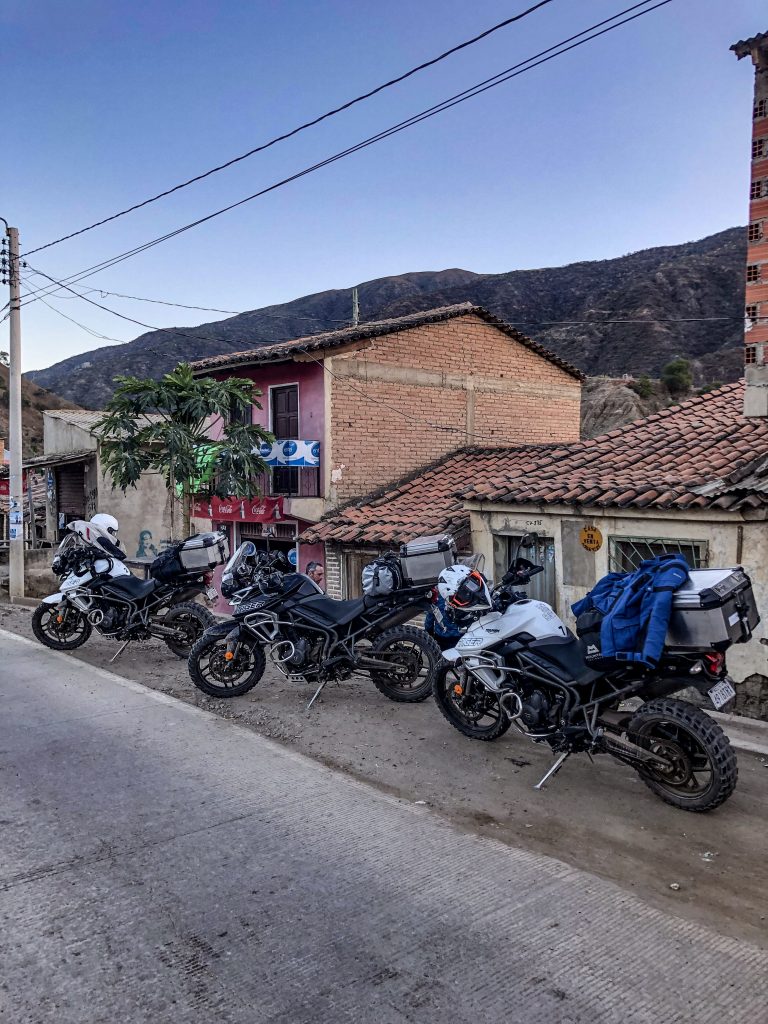
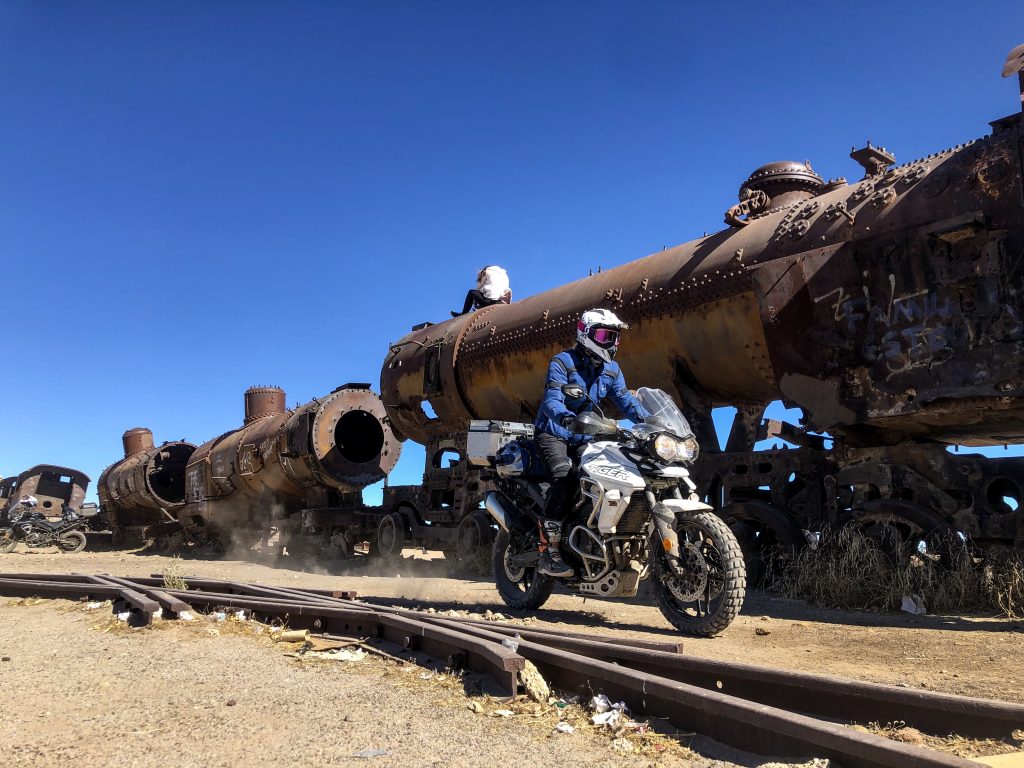
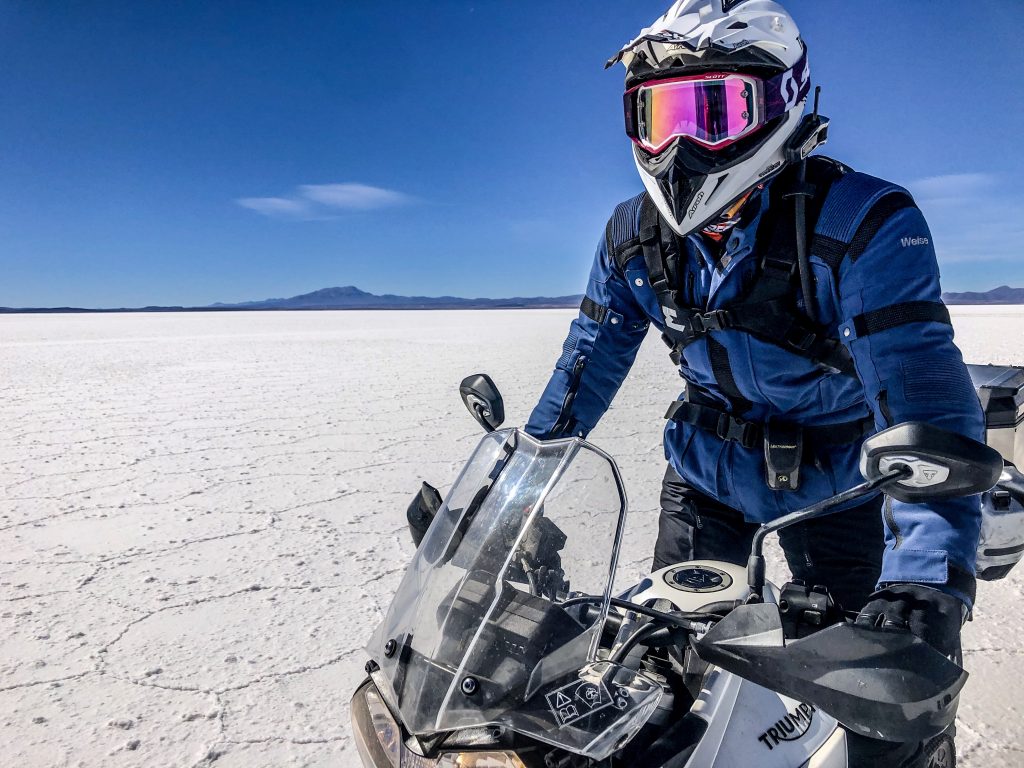
The Tiger 800s were fantastic and clearly very well looked after. The team did pre and post day checks to ensure a smooth trip, plus the knowledge of having the spare bike in the truck meant we knew we were in good hands.
Accommodation varied from absolutely breath-taking luxury in the salt hotel to more modest and grounded options immersed in the culture. All had comfortable beds and hot showers, all clean and well presented. The food was also amazing, full of flavours and variation.
Do I recommend Bolivia?
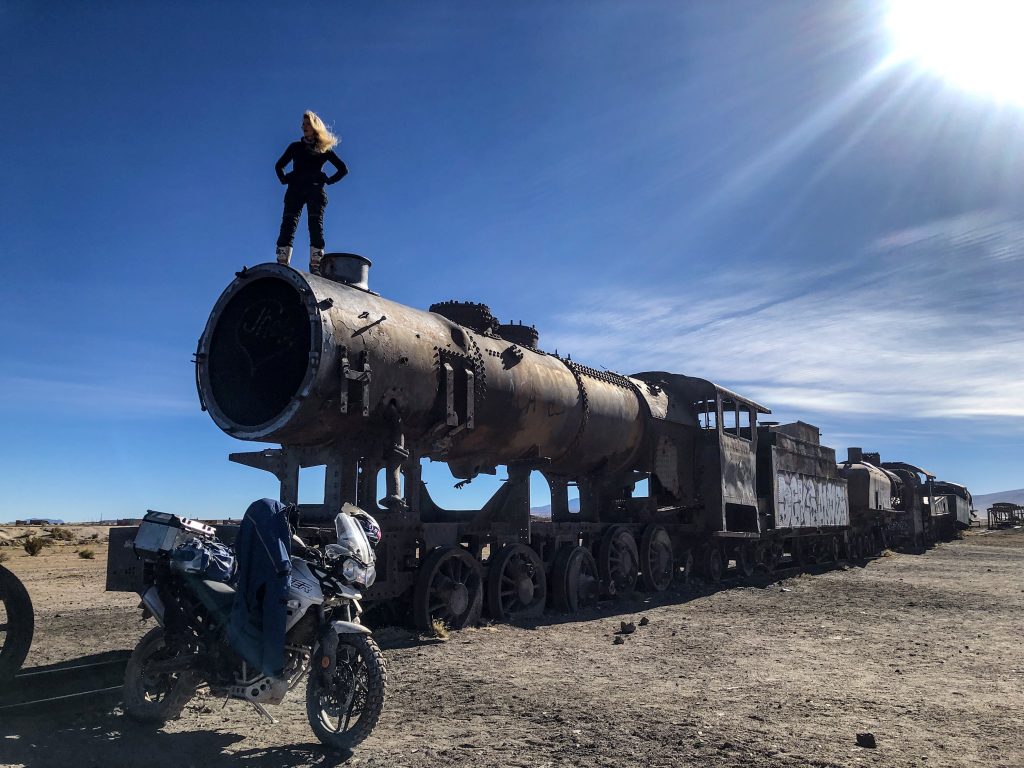
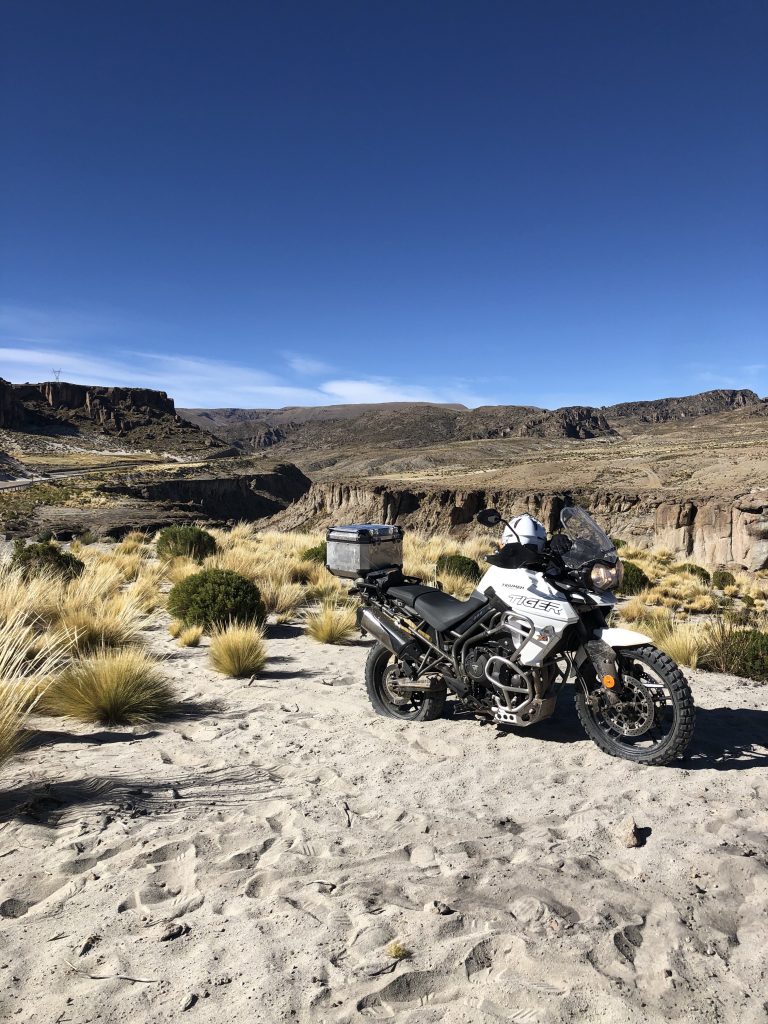
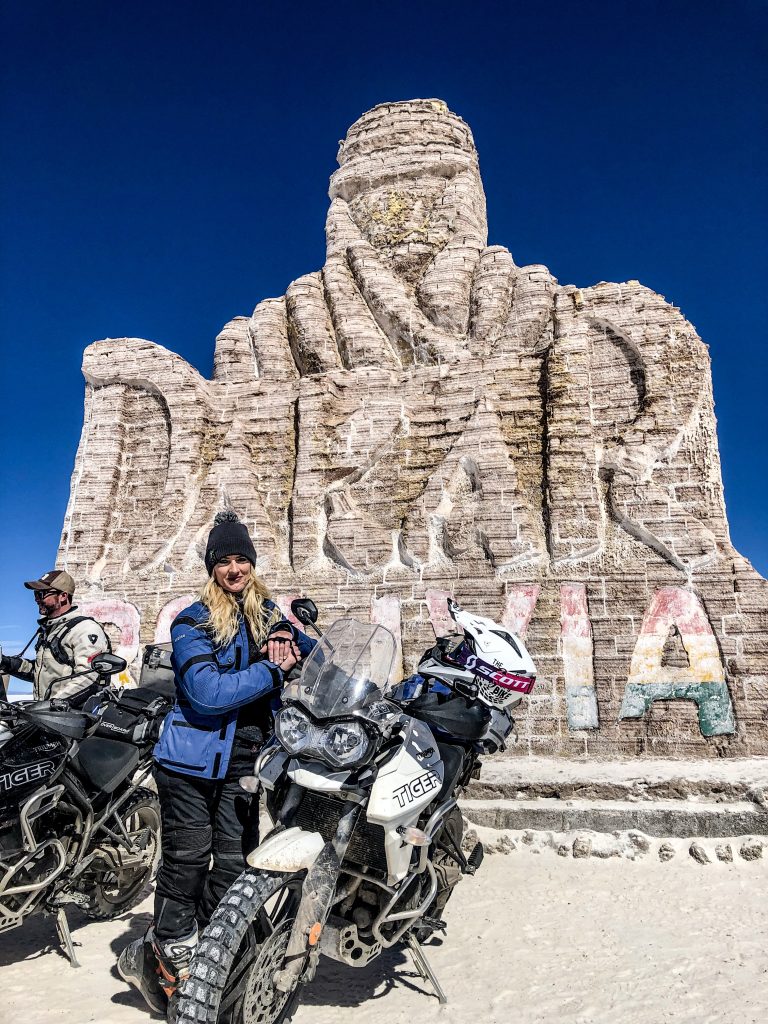
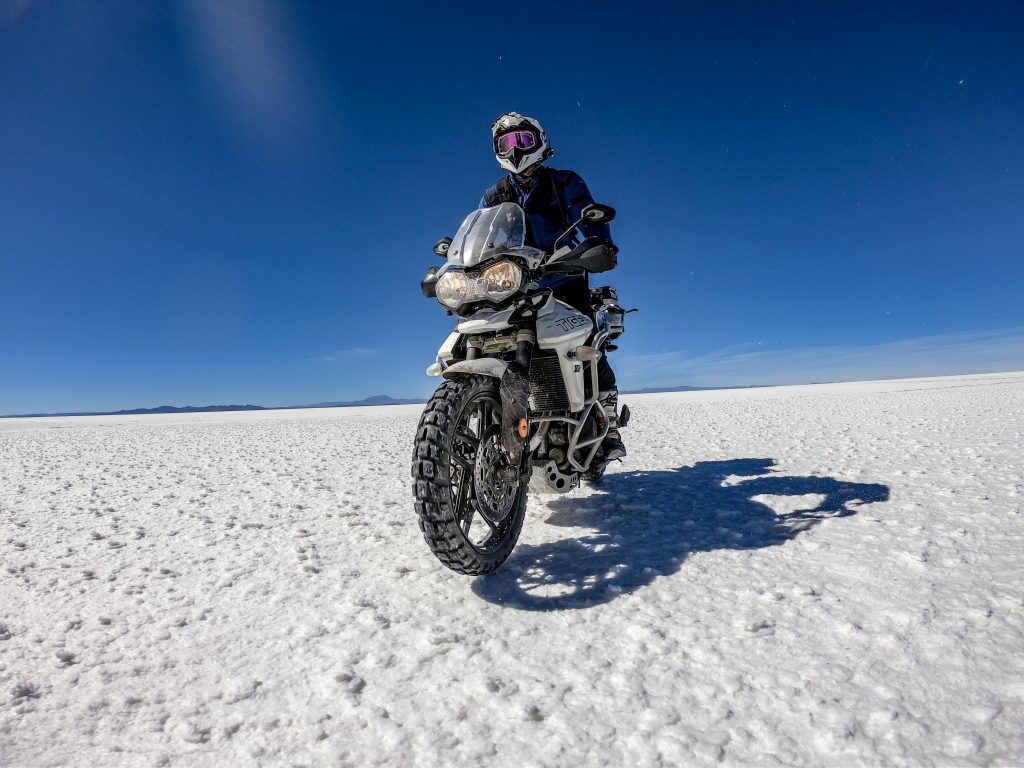
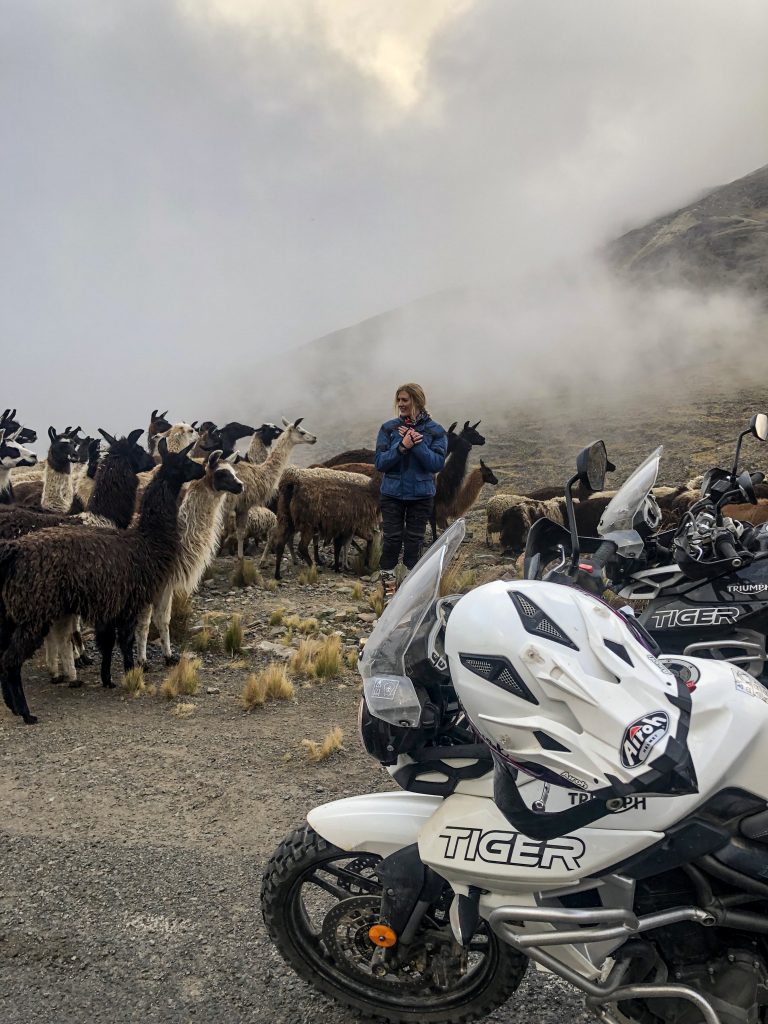
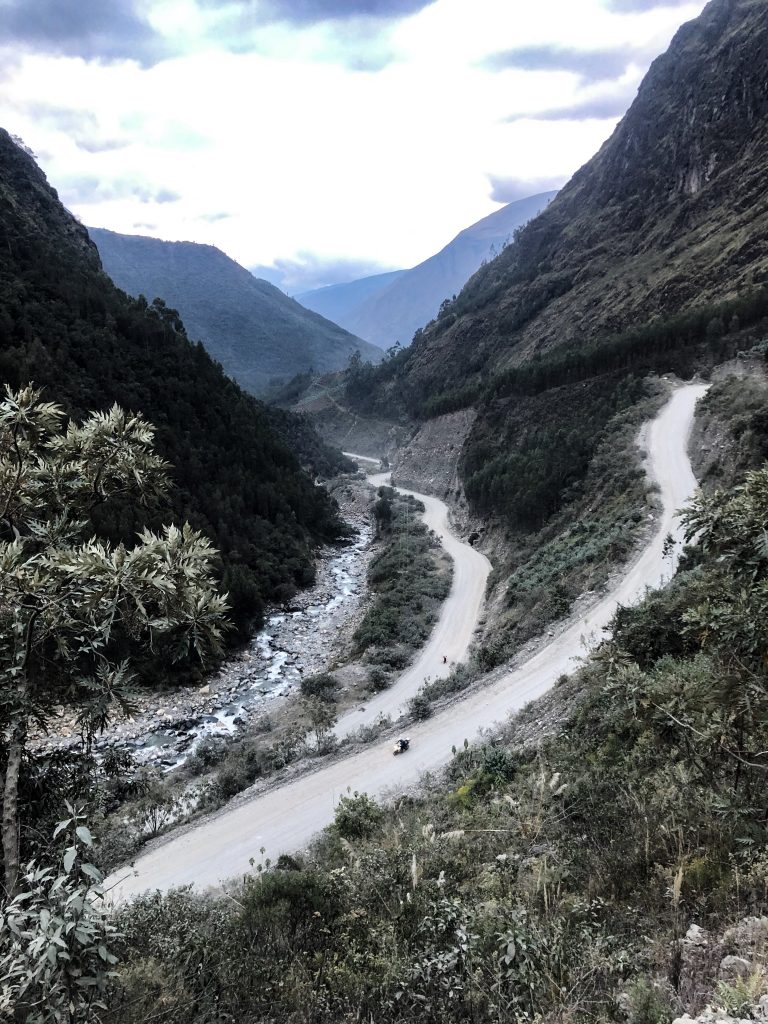
Absolutely! The variation in landscape meant it felt like we were riding through 6 countries, not just one. From the Amazon jungle rain forest, the sweeping valley roads, rocky rugged terrain, alpacas roaming free, Andes’ Altiplano plateau at more than 3,500m above sea level, death road, the largest salt flats in the world. Every day was a new adventure and the culture so welcoming.
Destination highlights included starting in Santa Cruz and traveling to Refugio los Volcanes, Sucre, Potosí, train graveyard, Salar de Uyuni, Oruro, Quime, Coroico, The Yungas (Death Road).
It was a wild adventure!
I could not recommend Novo Adventures more highly. They really are the connoisseurs of adventure riding in Bolivia! Get it booked!
Here are some of my favourite photos from our trip with Novo Adventures:
Scroll for videos too!
Here’s some video from our Novo Adventure trip:
We even did some crazy still like going into an active mine and buying dynamite!
If you’re new to my page – it’s more than just dirt bike riding and racing, I’m on a mission to prove that nothing is impossible if you want it bad enough. See more about my story plus read about my life changing accident, which started it all.
Pause for thought – do we really need so much stuff?
As heard on BBC Radio Oxford
My pause for thought is reflecting on all the things around me. Since life changed with the nation going into lock-down we have been living in a different world. Previously at the click of a button or quick pop to the shops we could get pretty much anything we could wish for. Whether that be toilet paper or something more exotic. However, with many business closing in quarantine, times changed. There is no longer this instant gratification and convenience to get your hands on ‘things’ and this has led me to a realisation on many occasions…a thought process where I went from ok I ‘need’ new thing, to…can I get it?, to…do I really need it, all the way to actually, I really can live without it and actually I already have that which would do just as well…or even a full realisation that I just didn’t need it. That is time not used, money not spent and energy saved just from having to really think about the need.
I’m appreciating the value in things around me to a new level. The things I already have. Last month I trimmed a small tree down in the front garden and without thinking threw it in the wheelie bin for the refuge team to take away. But then I realised. That wood, is valuable to me. If I take the time to cut it and store it, in a few weeks I’ll have wood to fuel our little chimenea in the garden. Unable to go out and buy wood we’ve since had cherished fire side evenings burning what I once saw as waste. In modern life it is sometimes too easy to just go out and buy ready to use things, disregarding the waste or whether we really need it.
Cherished fire side evenings burning what I once saw as waste
Maybe I’ve been running life at such a pace I’ve lost my grounding, but with lock-down I’m feeling a new energy from opening my eyes to what I really need. I’ve got by with less stuff but has my quality of life been impacted? If anything, it’s rather uplifting to see I don’t need so much.
It seems this can also relate to the ‘admin’ of life. Many are returning to reduced capacity working environments where the focus is on the essentials, and what is incredible is that in many places, this is not showing huge gaping holes opening up, but instead highlighting that in countless ways the world can go round with less energy. The efficiencies of a reduced team or the forced requirement to re-think how things are done, streamline processes, are leading to less admin and more productivity. The pointless emails or amount spent traveling for a meeting that could easily be done on a video call.
There’s so much inefficiency in the world. So much stuff. So much waste. Chasing things, where actually, lock-down as proven to me that things don’t bring happiness. Experiences and time, connections and friendships, they bring happiness.
A precious commodity in manic modern life.
Experiences and time, connections and friendships, they bring happiness.
Thank you for reading my pause for thought as heard on BBC Radio Oxford
If you’re new to my page – it’s more than just dirt bike riding, Harley’s and racing, I’m on a mission to prove that nothing is impossible if you want it bad enough. See more about my story plus read about my life changing accident, which started it all.
My life changed dramatically in March 2014 with the accident, here’s what happened
My life was full of adventure; I literally lived for the sport, for activities, the great outdoors. There was this constant underlying thirst for adrenaline. With a full-time job, I found my ways to shape life around these needs. Weekdays entailed a 16-mile daily cycling commute, lunchtime gym sessions and summer evening wakeboard sessions, you’ve got to love long summer nights. Once 5 o’clock hit on a Friday work was out of my mind and weekends were filled with road trips kite surfing, mountain biking and climbing.
But things took a life-changing turn on the 25th of March 2014. It was a pretty normal Tuesday, work had been as busy as always, but that was over for the day. I jumped on my bicycle with the fresh feeling of spring in my stride and hit the road pedalling hard. I was on route to the wake-boarding lake, a short 8-mile ride from work. It was going to be a great evening, a couple of sets behind the RAF Nautique wake boat, followed by some steak and veg on the BBQ by the lake watching the sun go down. Little did I know that my world was about to turn upside down. I had barely left work, maybe a mile of tarmac had passed, and I was cruising along with the flow of traffic. I was delighted to see the traffic signal switch to green on approach, and I was able to keep the rhythm going, I pedalled hard to keep momentum. That was when it happened.
Out of nowhere an oncoming car pulled across in front of me. I had a microsecond. Time seemed to go into slow motion. But there was nothing I could do. There was no route for avoidance. No hope to avoid impact. I felt my body crumple as I shattered into the rear passenger panel. My right shoulder took the full impact, soaking up the 15 mph to standstill impact. My body screamed internally before collapsing to the ground on my right side. Time was different. I could feel my heartbeat; my pulse thumped through my veins, my surroundings were almost a blur. Time was still.
Then, with a bang, full speed realities of life kicked back in. I could hear traffic, car doors, and people crowding around me, voices, and people asking if I was ok. Was I ok? I didn’t even know at this point. All I really knew is that I was on the ground in the middle of a rush hour junction with a bike stuck between my feet. My feet were stuck. Argh, my cycling cleats, they were stuck on my pedals. I felt trapped and tried to move but quickly found my right shoulder was not going to be any use helping me up. I remember shouting, shouting in pain, in rage, in anger, ‘why’ ‘what the hell’ ‘it was a green light’ ‘why did the car cut across’.
I was really fortunate in the care and compassion of the passers-by. They helped me up and out of the road, collected my sprawled belongings of bike lights and removed shoe [to get me off my bike] and aided me to the safety of the curb where I awaited the ambulance. So much for an evening at the lake.
At the time, I had no idea of the full extent of the injuries; I was sent home from A&E with strict instructions to rest and let all the inflammation die down. The focus was my double size shoulder, which took the head on impact, my dislocated finger that was already swollen like a deformed balloon, and my right knee and hip following their hard encounter with the tarmac. I quite literally looked like I had been in a car crash. Ironic, really!
I was feeling incredibly shaken up, as one would expect following a head-on collision with a red light jumping car, my body was hurting beyond belief, but my get-up-and-go attitude had me staying positive about the short-term implications.
Little did I know that the world as I knew it was going to disappear for years. While the initial injuries were not life-threatening, they were definitely life-changing, and it was going to be a long road to full fitness.
That day changed my life.
Today, years since the accident in early 2014; my body has been through so much, over 13 months off work, 7 operations, full shoulder reconstruction [yes I am now partly bionic], 6 hip surgeries and years of rest, countless steroid injections [12], hydrotherapy, osteopath, shock wave treatment, acupuncture, red light therapy, CBD oil, spiritual healing, Physiolab ice treatment, daily active collagen, months and months of physiotherapy, and I’m still having treatment with my troubled hip persisting.
Shoulder reconstruction
In brief, the most impacting injuries included my shoulder and hip. My right shoulder has now been fully reconstructed with my ligaments being removed and replaced by an artificial surgili fiber, the bone cut short to allow it to reset, before being bolted back together. My shoulder surgeon, the third consulted who finally knew what and how to fix me, Carlos Cobiella, has been incredible. Despite being aware of my shoulder in everyday life on a multiple times a day basis, my shoulder has recovered to a level that will enable me to participate in my sports again, full functionality, full range, just a little grumpy and I will certainly pay for the fun with soreness afterwards – one of the hardest parts was actually learning to trust it again. The scar is beautiful too, a really clean 4-inch line across the top of my shoulder and three key hole marks. Incredible, given the mess it was in.
Hip complications
On the hip side, the repairs included bone removal and refinement, cartilage re-graft, ligament repair and stem cell treatment for soft tissue repair, followed by a series of steroid injections totalling 7, rest, two bouts of shock wave treatment, osteopathy, hydrotherapy and physio. This then continued with more surgery, hip fluid replacement, manipulation under anesthesia, labrum removal with donor graft replacement and further bone refinement. I also had to see multiple specialists until I found one able to fix me, Ali Bajwa and then Tony Andrade who have been incredible. In late 2017 I underwent my third hip surgery, with a full reconstruction of the cartilage, fully removing the labrum again and replacing it with donor cells.
Sadly though, this reconstruction failed, which can happen with absolutely no explanation. Simply it just didn’t take. I thus had to undertake the same full reconstruction for the second time in late 2018, my fourth hip surgery.
This surgery had me going pretty well for a good 10 months, however with lock-down forcing me to slow down I also started to listen to my body. I realised I was pushing on through a level of pain that a 33 year old just shouldn’t live with. In many cases pain is the body’s way of telling you to stop and rest, however once you’ve had significant injuries it’s possible that the pain just never really goes away. If I always listened to the pain and rested, I certainly wouldn’t be where I am now but at this time I knew I needed to listen.
My instincts were right and it turned out a “dangly” bit in my labrum had broken off the cartilage, a very clear cause for the pain and the join was still not mechanically sitting right. May 2020 saw hip surgery number 5, op 7, with a labrum repair and bone work.
I have always been religious in my physio, including the use of a Compex machine, PhysioLab, daily Active Collagen and Red Light Therapy with my complete commitment, and I’m feeling confident that 2020 will finally be the year I get back to sports.
Compex is an electric muscle stimulation machine designed to help reawaken the connection between the muscles and the brain. For the first 3 months this was used for 20 minutes 7 times a day on a range of muscle areas and really helped to get the dormant muscles back firing.
PhysioLab is machine that enables the application of cooling and compression and is used for the treatment of pain, swelling and inflammation [prof sportsmen use them lots]. I use it for 30 minutes every 2 hours for two weeks… It’s blinking freezing strapping around my waist / hip and pumping 6 degree ice water the body. Normal ice packs for cooling will only penetrate the first layer of the body but the combination of the compression and pumped ice water enables the cooling to penetrate 2-3 inches. The idea is that this helps smash away inflammation, freeing the pain and joint to allow you to push forwards again. With so many years of trauma and injury the joint’s become use to just being angry.
Red Light Therapy is a specific wavelengths of red light create a biochemical affect in our cells that serves to increase mitochondrial function. ATP is the source of energy for every cell in the body. So without it, we don’t function at all. Without enough of it, we don’t function well. It’s well known for it;s support in healing, energy, scaring, inflammation, tissue repair and a huge long list of other things.
Active Collagen – most will think of gorgeous smooth skin and wonderful hair but that’s not why I’m on it…although I won’t complain for those benefits. I’m on it because collagen contributes to the maintenance of ligaments and tendons, soft tissue repair, and protein synthesis, so recovery, healing and a smooth working body! My hip is something I battle with every day and I big time feeling the benefits in it. See more on why I take Active Collagen here.
The reality is I’ll highly likely, 95% according to the medical teams, need a new hip within the next decade. But that’s not going to stop me from pushing on and having the most fun I can with my body. So that’s where I’m at in mid 2020. I’m back pushing on but with a hip that is very much not ideal but thankfully it loves biking. I can’t walk far but who needs to walk when you can bike!?
How the bikes fit in
Some may wonder how I’ve been able to ride motorcycles during my recovery, given the injuries. But most of the people who ask are those who don’t ride, as those that do realise that you don’t need to be strong to road ride – cruising. If you have balance and coordination you’re be fine. But it’s important to realise that I’ve not been riding the whole time. It was a long time before I got my first motorcycle to avoid traffic on my commute. I was then unable to ride again for months post each of the 7 surgeries. But I’ve always pushed hard to get back on the bikes. Without my sports, the bikes, especially the Harley, have become my way of coping, my escapism, my bit of adventure and adrenaline. My life would have been a much darker place without them. Even just being able to go out to the garage on my crutches and look at them, polish them. It’s all helped my morale. The I started a new hobby with the dirt bikes as things started to improve physically. I’ve had periods across the years where I was able to get on the KTM/Husky, however further hip complications has repeatedly pulled me off it again, forcing more medical rest and surgery. See hear how I got into bikes in the first place please see here.
With time and patience, I knew I would get back to riding – only I had the power to make it happen and hard work always pays off.
Psychological impact of the accident
Beyond the physical implications, which have been life-changing, I have also been on a roller coaster of emotions; my body has changed, my daily activities, my ability to do sports, my views on the world, views on life, recovery and even pain have changed. My view on ‘who I am’ has changed, who I was has gone. And it is this, these discoveries that have led me here, to where I am today. I am now a stronger and more determined person than ever before, and through this life experience has grown ‘The Girl On A Bike.’ I’m more grateful than ever for what I do have, more thankful for the wonderful things around me.
The girl on a bike the accident hip surgery 2
The girl on a bike the accident hip surgery 3
The girl on a bike the accident hip surgery 1
My recovery from the accident is not yet over. However, the end of the tunnel is in sight and getting brighter with every month that goes by; which means exciting things.
My world of adventure and the former athletic me is coming back, and I will make sure it comes back. But either way, I want to help encourage others to join in too, to make the most of every day. I would love to help boost others to have a little more confidence in themselves, to maybe live the precious moments in a life a little harder, to help people join in with the sports I love, to get out on two wheels, share the addiction. The world is full of so many people, passionate about an aspect in their life, for me, it’s definitely ‘The Girl On A Bike,’ I am passionate about so many things as well; I enjoy a long list of sports, but motorbikes are so central to everything. And with two-wheel, you can travel to some unique destinations, escape a long day at work with a blast of wind in the hair, explore the countryside and even combine two wheels with holiday travel adventures.
Fancy joining for the ride? Tag #TheGirlOnABike and let’s get the adventures started.
What can you expect to hear from me?
It’s all about making the most of life on two wheels. You will learn more about who I am and my adventures making the most of each day. I plan to get stuck in with motorbike DIY following the motto that if “I can do it. You can do it!” (for the bike and inspired by the bike). Plus some bike essentials and product reviews, and as I get out and about I’ll share with you some of my adventures.
Finally, as my body allows I will add sports, from kite surfing and wakeboarding, to muddy mountain biking, spider inspired climbing and snowy snowboarding and snow-kiting.
Ultimately it’s all about tips for enjoying life, being more positive, exploring the great outdoors, making the most of our lives, my personal experience on health and nutrition [disclaimer, I am not an expert, but I know what works for me], and all wrapped up in some life learning’s in coping with difficult life issues, such as my accident or living with Vitiligo. I will be sure to review places I go to help others navigate the best spots and will most likely put in a few words about the kit I use.
Finally, I feel I should add that; all opinions will be my own.
If you’ve had any similar life challenges, then I would love to hear from you. I’d also love to know if there are any topics you’d love to see me cover! Get in touch with me via email or Instagram!
If you’re new to my page – it’s more than just dirt bike riding and racing, I’m on a mission to prove that nothing is impossible if you want it bad enough. See more about my story plus read about my life changing accident, which started it all.
As you know I’ve been battling with my body following the accident in 2014 for some time. 7 surgeries down and more physio and treatment than you can shake a stick at. The body is a really darn complex thing but with the right love and attention it can do wonderful things.
I started taking something called active collagen desperate to find something to help. Most will think of gorgeous smooth skin and wonderful hair but that’s not why I’m on it…although I won’t complain for those benefits. I’m on it because collagen contributes to the maintenance of ligaments and tendons, soft tissue repair, and protein synthesis, so recovery, healing and a smooth working body!
Collagen is the primary protein in the body… supplementing with the right collagen helps you recover from exercise faster. Active Collagen is formulated to support your ligaments, tendons & muscles… backed by clinical studies & scientific data… U Perform is the UK’s leading sports recovery brand that delivers results. Give your body the support it needs with www.u-perform.co.uk
Active collagen is used by Olympic & World Class athletes to train harder & recover faster… daily use can support your active lifestyle by helping to reduce the risk of injury and optimise your recovery from exercise. Active Collagen is also Informed Sport registered & tested. See and feel the difference for yourself and use my offer to get 20% off all U Perform products.
My hip is something I battle with every day and I’m big time feeling the benefits in it. It was amazing to see how the surgeon was blown away by how secure the previous reconstruction looked & I hands down put it on the collagen. I could not recommend it more highly! Even my right shoulder previously reconstructed & my left knee which niggles me are improved, no pain in the morning, skin’s improved too (bonus).
I made the decision to take active collagen as I was desperate to find anything to help the pain and get my body in the best state possible given it’s the only home I’ll ever have. You can’t put a price on feeling good. It’s not the cheapest but you get what you pay for and that’s still nothing for improved pain and healing and it’s a solid dose of multiple forms of collagen. It can take 3-6 months to get the full benefits but I started to notice it after just two weeks. I could not recommend it more highly. Even if you just take it for 6 months and see how you feel
I’m a few months in on U-Perform and will keep you posted, so far my U Perform review is very positive, AND I can already tell that there is unlikely to be another day where I do not take it. The benefits just feel too good.
What is collagen?
Collagen is the most abundant protein in your body. As a result, it is the major component of connective tissues that make up several body parts, including tendons, ligaments, skin, and muscles. This means collagen has many important functions, including providing your skin with structure and strengthening your bones. It’s really important to do your research when it comes to collagen though, as will all health supplements, you really do get what you pay for! Go cheap it’s going to be a poor low quality form, unlikely to give you anywhere near the same health benefits.
Some key active collagen health benefits include:
1. Can improve skin health
Collagen is a major component of your skin and thus it plays a role in strengthening skin, including elasticity and hydration. As you age, your body produces less collagen, leading to dry skin and the formation of wrinkles.
2. Helps relieve joint pain
Taking collagen supplements has been shown to reduce inflammation and stimulate collagen synthesis in the body. This may help promote pain relief among people with joint disorders like osteoarthritis.
3. Prevent bone loss
Your bones are made mostly of collagen, which gives them structure and helps keep them strong. Just as the collagen in your body deteriorates as you age, so does bone mass. This can lead to conditions like osteoporosis, which is characterized by low bone density and linked to a higher risk of bone fractures. Consuming collagen supplements can help reduce the risk of bone disorders like osteoporosis. They have the potential to help increase BMD and lower levels of proteins in the blood that stimulate bone breakdown.
4. Boost muscle mass
Between 1–10% of muscle tissue is composed of collagen! This protein is necessary to keep your muscles strong and functioning properly. Studies suggest that collagen supplements help boost muscle mass and thus the loss of muscle mass that happens with age.
5. Promotes heart health
Taking collagen supplements may help reduce the risk factors associated with heart conditions such as atherosclerosis.
6. Other health benefits
Collagen supplements may have other health benefits, but these have not been studied extensively.
Hair and nails. Taking collagen may increase the strength of your nails by preventing brittleness. Additionally, it may stimulate your hair and nails to grow longer.
Gut health. Although there is no scientific evidence to support this claim, some health practitioners promote the use of collagen supplements to treat intestinal permeability, or leaky gut syndrome.
Brain health. No studies have examined the role of collagen supplements in brain health [that’s a complex process to prove] – however, some people claim they improve mood and reduce symptoms of anxiety.
Weight loss. Some believe that taking collagen supplements may promote weight loss and a faster metabolism.
Given collagen is fundamental to nearly the completely workings of the body there are so many ways in which people feel the benefits! Anything from skin, joints, bones, to brain, heart, and gut health, as well as even help control weight and keep hair and nails healthy.
I encourage you to give it a try for 6 months and see how you feel!
Collagen side effects
Currently, there are not many known risks associated with taking collagen supplements.
Where to get Active Collagen?
I’m honored to say U Perform have given me a link to share 20% off their product range – I personally take U PERFORM active collagen. The U Perform review from me is that I highly recommend it. You have nothing to lose trying it too as there are zero negative side effects.
Pause for thought – do we really want life as we knew it back?
As heard on BBC Radio Oxford
If you prefer to read, here is my pause for thought:
Hi, my name is Vanessa Ruck also known as The Girl On A Bike and my pause for thought began in 2014 when I was involved in a life changing accident while cycling. Over the following 6 years I was on a mental and physical roller coaster to get my life back. A life of extreme sports, peak fitness, and most importantly pain free living. I battled through a time when I didn’t even see myself as me, this broken body unable to participate in the activities I loved was not me. Many of my friends would ask me “when is Vanessa” going to be back?
Exploring the countryside around home
And then it happened. I realised, not over night, but in an awakening journey about what recovery really means.
When people say ‘recovery’, you typically think of returning to how you were before. But there is no going back. You do not merely recover, you reinvent yourself. You learn so much as you fight through, you see things in new ways and discover new truths; it’s an irreversible journey.
As I record this sat at home in lock-down I see so many similarities to the world’s battle with covid-19. None of this was planned but it is unfortunately the reality of the world we live in right now. The effects are life changing, life as we knew it torn apart, and impacts likely to last well into the future.
I hear so many talking about wanting life back, going back to how things were before. But I can’t help but wonder if that is really what we should want. Lock-down has taught me a lot about myself and somehow made me look at the world in a new way. Always busy, rushing, doing, being, fighting to cram more in, have more, do more, be more. But what does it all mean if we cannot share it with our friends and families? I wonder if I am not the only one seeing what’s more important in life than things. Time is precious.
How many of us have had more phone calls with loved ones and friends more than ever before? How about grandparents, where before it might be months between visits, and now we are embracing video calling and connecting as much as we wish. I’ve had Friday night socials, coffees in the garden sunshine. Reconnecting with people where ‘time’ seemed to have drifted us apart simply because life was ‘too’ busy. I’ve even spent time encouraging more birds into the garden and enjoying their songs. Done jobs I never had the hours in the day to do. I’ve explored the countryside around home. Places on my doorstep so beautiful yet I didn’t realise they were there, instead, jumping on planes and traveling. And most importantly. I’ve stopped to listen and be grateful for everything I do have around me right now. Yes I would love to jump on my off road motorcycle and tear off into the wilderness, but life, even in lock-down is a blessing to be alive.
I think that after lock-down I will take learnings from this time, realising that life does not have to be quite so fast paced and hectic. Keeping a little stillness and deep breaths of appreciation, keeping stronger connections with those I love. Sometimes it is the simple things in life that can bring the most joy.
If you’re new to my page – it’s more than just dirt bike riding, Harley’s and racing, I’m on a mission to prove that nothing is impossible if you want it bad enough. See more about my story plus read about my life changing accident, which started it all.
How to Change a Bib Mousse Foam Insert Tube – Full Dirt Bike Tire Change Tutorial
With correct working methods and proper tools, a Rabaconda, a mousse tire change can be an easy 4-minute job. This process represents the everything I’ve learned from an array of YouTube videos into a process largely following the @Rabaconda 3-Minute Tire Changer method but super easy for anyone. You don’t need to be a pro to do a tyre in sub 5 minutes! And that’s axle to axle! If tyre changing is your hate, then this is the video to watch. Here’s a full how to tutorial video with all the top tips to get your tyre changing time down to as near to the 3 minute pro time as possible.
Using this process I’ve got my time down to 4 minute 22 seconds!!
If you’re not into videos please keep reading for a step-by-step written process to changing a tyre with the Rabaconda tyre changer:
Set up Rabaconda – estimate 2.5 minutes
Rabaconda tyre changer
Set up according to your wheel size, I’m using an 18-inch tire for the demo and I already have it here set up at the 18-inch marker
Recommended to have sprocket down and the disc side facing up to give you more room to operate the tire irons
Loosen rim lock – do not removed, instead lossen to the last couple of threads. Keeps it in place but easy to work around
Position the rim lock opposite the bead breaker system
Grab a tire iron and use the straight end for dismounting. The straight end is easier to insert. It is stronger. And later, it is easier to get them out between the tire and the rim.
Using a double motion action – grab the Rabaconda handle and position the bead breaker as close to the rim as possible. Sometimes the mousse can be really hard and it’s so difficult to get the tire irons between there. The key here us to put your body weight as close to the end of the green lever as you can for full leverage, simultaneously pushing the tire iron. It’s best done with one quick and strong double movement.
Using four levers place them in using the same method roughly a 4-inch or 10-cm distance between the tire irons.
Now, quickly check if they’re nicely engaged. If you pull and they don’t slide out, then it’s all good.
With really hard mousse, there’s also one trick to get the tire irons flipped easier. You need to brake the bead from the opposite side. This will allow the tire to come over the rim more easily.
Now leverage the tyre off. Grab one in the middle first If and the other one in the middle. If you grab the ones in the middle first, then those two here won’t slide out. If you start with the one on the side, the other ones might slide out easily. Now you can see the straight ends come out easily between the tire.
Now that you have about a quarter of the tire dismounted, it’s time to flip around the tire. Flip around the wheel
Position the section which is just dismounted tyre under the bead breaker. Grab the handle again and start pushing the tire off.
With force but being careful not to rip the tyre you can dismount both sides of the tyre using the Rabaconda
Once you’re at the rim lock, change the Rabaconda setting and push behind the rim lock, it should slide off effortlessly
It’s actually possible to mount a new tire without taking the old one off. But I’m mounting the same tire here for the demo purpose.
Prepare your mousse as normal – do your homework here
Ensure your tyre is the right way if directional
With rim lock opposite Rabaconda arm, engage the rim lock and then using one lever to get the bottom of the tyre on. Once on you should see no mousse on the top,
Position rim lock directly under Rabaconda arm and use first lever using curved end. Hook this under the Rabaconda lever holder
Now using two levers work around the tyre pulling it on. Big chunks at first getting smaller
At the 2 and 10 o’clock position place a lever in the removal position. This will hold the tyre low in the rim to allow easier rim lock installation in a moment
Continue around the tyre
Once at the rim lock using a level leveraged on the brake disc push the rim lock in – and in the same moment push the Rabaconda down onto the tyre edge. Engaging the tyre in full
Tighten rim lock and refit to bike.
Rabaconda tyre change with mousse
Here’s me using the Rabaconda for a 4 minutes 22 second tyre change:
If you’re new to my page – it’s more than just dirt bike riding and racing, I’m on a mission to prove that nothing is impossible if you want it bad enough. See more about my story plus read about my life changing accident, which started it all.